With 1Password Business, you can set up automated provisioning to help centralize access management in your account. When you connect your identity provider with your 1Password account using 1Password SCIM Bridge, you can invite, suspend, and manage team members directly from your identity provider.
1Password Business supports two types of integrations with identity providers:
- Automated provisioning with SCIM: Automated provisioning, role-based access control, and administrative workflows. All users except guests can be managed with automated provisioning.
- Unlock with SSO: Team members can unlock 1Password with their identity provider credentials.
Each integration serves a different function, and they can be used together or on their own. To use both integrations with your account, you’ll need to create separate applications for each one in your identity provider.
In this article, you can learn more about how automated provisioning with SCIM works and some best practices to follow when you set it up for your team. If you want to allow your team to unlock 1Password with their identity provider credentials, learn about the best practices for using 1Password Unlock with SSO.
Set up and deploy your SCIM bridge
Automated provisioning with SCIM can help your team with:
- Group management: Groups in your identity provider can be imported to 1Password and group membership can be managed from your identity provider.
- Onboarding users: You can invite users to 1Password from your identity provider. Your SCIM bridge will automatically confirm the users after they sign up.
- User management: When you change a user’s email address or display name in your identity provider, those changes will also be reflected in 1Password.
- Offboarding users: When you deprovision a user in your identity provider, their account will be suspended in 1Password.
When you first set up automated provisioning, it won’t affect your account until you assign 1Password to users in your identity provider. Make sure you add a user or group who can test the integration. We don’t recommend adding your whole team right away. Gradually add groups of users to make sure the rollout goes smoothly.
Important
If you use Google Workspace as your identity provider, you’ll need to add all the team members who already exist in your 1Password account. Any existing users who aren’t provisioned will be suspended, so take this into consideration when planning your deployment.
Learn more about automated provisioning with Google Workspace.
As you plan the deployment, consider the people in your organization that you’ll need to involve:
- Identity provider team: Use the app inside your identity provider to provision users and groups as part of their daily administrative tasks.
- Infrastructure team: Deploy 1Password SCIM Bridge to a cloud platform or on-premises virtual machine. They’ll need to note where the SCIM bridge is deployed and update it when new versions are available.
Manage and secure your provisioning integration
Make sure your scimsession file and bearer token are kept safe. We recommend storing them in 1Password. If you accidentally lose or expose these secrets, make sure you regenerate them, then update the scimsession file in your SCIM bridge and the bearer token in the identity provider application.
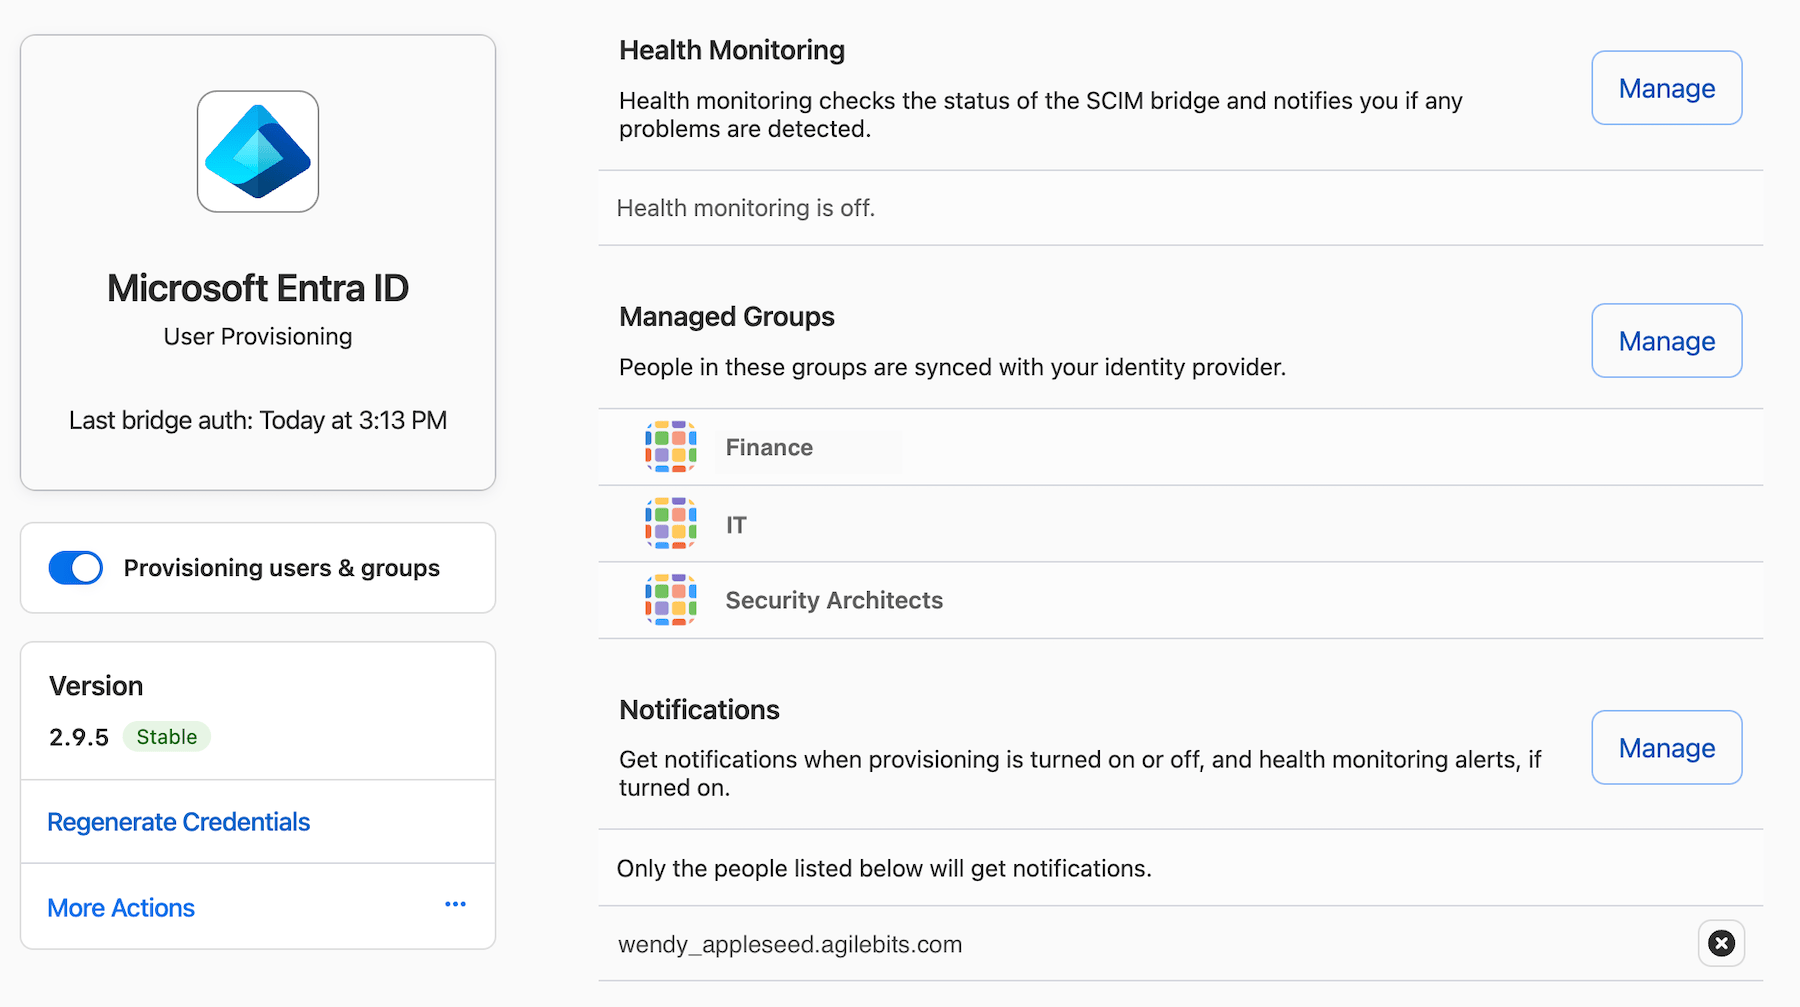
Turn on health monitoring to receive an email if your SCIM bridge is offline. This uses a third-party service called Checkly to ping your SCIM bridge occasionally. If you turn on health monitoring, verify if you need to add or change any firewall rules to make sure Checkly can connect to your SCIM bridge.
To change who gets notified when your SCIM bridge is offline, choose Manage in the Notifications section and enter an email address you’d like to receive notifications.
After you set up automated provisioning, you’ll see a new group in your account called Provision Managers. It’s required for automated provisioning, so don’t delete it. Do not add any users to this group.
Add groups
Before you add a group to 1Password:
- Create one or more vaults for the group to store and share items in.
- If there are people in a group that you don’t want provisioned to 1Password (for example, directory service account identities), you must set up filters in your identity provider to exclude them.
When you assign groups in your identity provider, the users in each group will be provisioned to 1Password. You can manage group permissions, create custom administrative roles, and grant vault access to groups from the Groups page of your account on 1Password.com. You can also view and update the list of provisioned groups in your account from the Managed Groups section of the Automated User Provisioning page.
We recommend that you follow the principle of least privilege and only grant the group and vault permissions and access that each person needs for their role in the organization.
Important
Okta does not automatically create groups that are assigned to an application. You can use Okta’s Group Push feature to push directory groups into 1Password for role-based access control. Only assigned users are synchronized to the group that appears in 1Password. Learn more about automated provisioning with Okta.
It can be helpful to create a group with all of your 1Password users, then provision the group in addition to your functional groups. The benefit is that users belong to at least one group, so moving them from one group to another for role-based access control won’t temporarily suspend their 1Password account.
1Password does not support nested groups or role assignments.
Provision users
You can invite users individually to test automated provisioning or provision them with groups when you’re ready to start your rollout. With automated provisioning, users are confirmed automatically – there’s no need for an administrator to manually approve them afterward.
When you assign a new user or group to 1Password:
- They’ll receive an invite email.
- They’ll follow the steps to sign up.
- The SCIM bridge will automatically confirm the new user within five minutes.
- They’ll get another email letting them know they can start using their account.
If a user with the same email address already exists in 1Password, they won’t be invited to the account or receive any notification about the invitation. Only new users who don’t have an account with their email address will receive an invite email.
Manage users
Manage existing team members
If you already have team members in your 1Password account before you start provisioning with the SCIM bridge, you’ll need to assign them to 1Password in your identity provider. Assigned directory users will be matched based on the team member’s email address in 1Password, and they can then be managed by your identity provider.
Edit user details
When you edit user details in your directory, such as display names or email addresses, the changes will be synchronized to 1Password.
Learn how to change a team member’s email address.
Deprovision team members
There are a few ways to deprovision a managed team member:
- Delete the user from your identity provider.
- Deactivate their user profile in your identity provider.
- Remove the user from all groups in your directory that are assigned to 1Password (or remove the group assignment), and remove any explicit user assignments.
After a user is taken out of the provisioning scope, their 1Password account will be suspended. We recommend you keep their account suspended for a set amount of time, such as a month, before you delete it, in case you need to recover their data. You can only delete a user’s 1Password account after they’ve been deprovisioned. Learn more about how to offboard a team member.
Learn more
- Automate provisioning in 1Password Business using SCIM
- Best practices for securing your 1Password Business account
Was this article helpful?
Glad to hear it! If you have anything you'd like to add, feel free to contact us.
Sorry to hear that. Please contact us if you'd like to provide more details.