When you try to connect Jamf Pro to 1Password SaaS Manager you will be asked for a Client ID and password. This article shows you how to create a Jamf Pro user account with the correct permissions.
How does 1Password SaaS Manager work with Jamf Pro?
SaaS Manager can connect directly to different SaaS tools (like Jamf Pro) to extract up-to-date information about the devices assigned to users in Jamf Pro, and the software on each device. If you wish, it can also be used to queue actions such as locking or remove erasing devices.
Important
As an administrator, you may have received an invitation from someone in your IT team asking you to connect Jamf Pro to SaaS Manager.
Jamf Pro lets you create API Roles and API Clients separately. We strongly recommend creating a dedicated SaaS Manager API Role, and a dedicated SaaS Manager API Client.
Note
Create an API role
In Jamf Pro, go to Settings > System > API roles and clients
Click the API roles tab at the top of the pane.
Click New
Enter
SaaS Manageras the Display NameIn the Privileges field, type in the privileges that you want to assign and select each from the list.
Mandatory:
- Read Accounts
- Read - Users
- Read Computers
- Read Mobile Devices
- Read Device Enrollment Program Instances (to fetch ADE device info)
Lock device:
- Send Computer Device Lock
- Send Mobile Device Lock
Erase device:
- Send MDM command information in Jamf Pro API
Click the Save icon at the bottom-right.
Create an API client
- Click the API clients tab in the API roles and clients section.
- Click New
- Enter
SaaS Manageras the Display Name - Select the SaaS Manager API role that you previously created.
- Enter
1800as the Access Token Lifetime (if you change this in the future you will need to rotate the client secret). - Click Save
- Click Edit
- Click Enable API client
- Click Save
Create an API client secret
Navigate to the SaaS Manager API client you just created.
Click Generate client secret
A confirmation dialog appears.
Click Create secret
A pop-up window appears with the client secret. The client secret will only be displayed once. Make sure you save it to a secure location before dismissing the dialog.
Note that the Copy client credentials to clipboard button will copy both the client ID and the secret to the clipboard. We recommend pasting this into a text editor, and then copying and pasting the client id and the client secret separately into SaaS Manager.
Connecting to Jamf Pro from SaaS Manager
If you received an email asking you to set up the integration, then just click the link, otherwise log in to SaaS Manager and go to Integrations to get started.
In the Search box, enter “Jamf” and select the Jamf Pro logo to get started.
Select the Connect button.
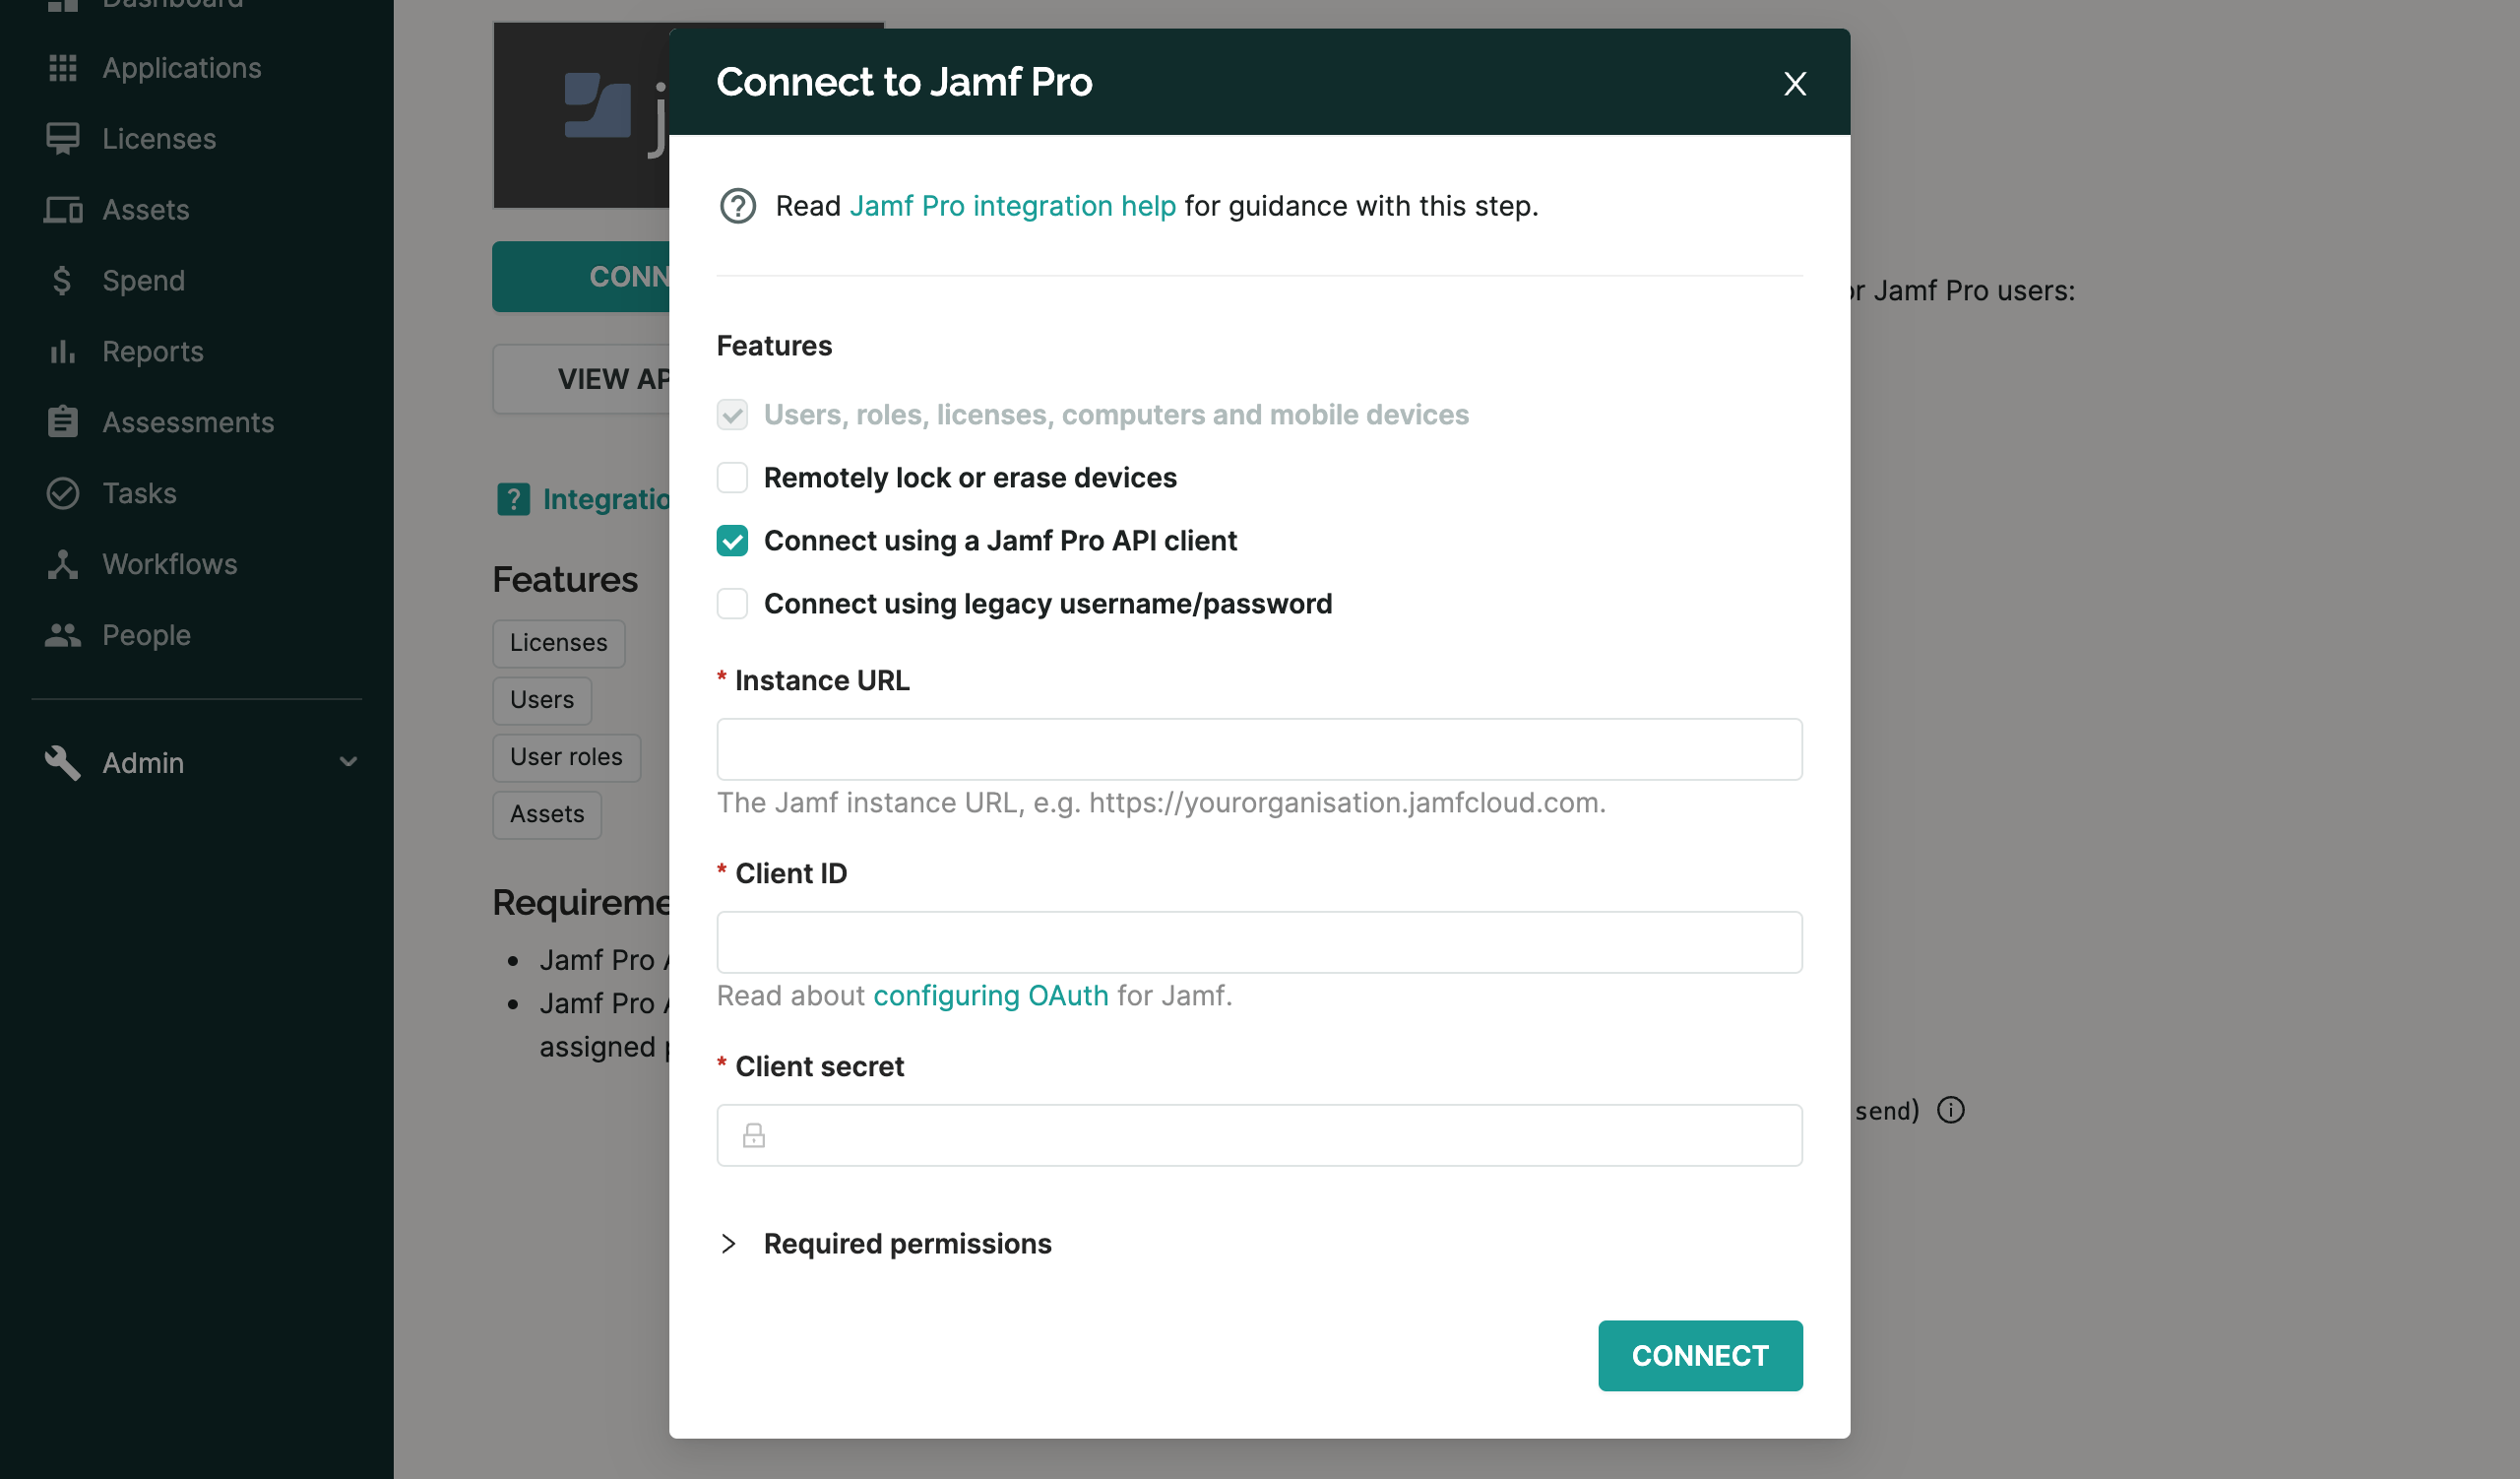
You will then be asked to enter the following details of your Jamf Pro account:
- Instance URL
- Client ID
- Client secret
Enter the URL you use to access Jamf Pro followed by the username and password for the Jamf Pro user account created in the previous step and then click Connect.
After a short pause, SaaS Manager will start to synchronize with Jamf Pro and you’ll see a green tick when everything is done.
Note
Remotely lock and erase devices
You can use the integration with Jamf Pro to lock devices from SaaS Manager. For example, you might want to lock users’ devices automatically as part of an offboarding workflow. For more information, see Lock devices during offboarding.
Occasional HTTP 500 error
Jamf has an ongoing issue where API requests to get computer data can fail due to ‘phantom’ devices. These are (according to Jamf support) created when computers are deleted whilst they are checking in to Jamf. This issue has existed for years and has still not been fixed.
Jamf support can fix the data but you may need to demonstrate the problem to their support team.
The shell script attached at the bottom of the page will do this. It has a .txt extension to avoid issues downloading from this page.
Download this and then open Terminal in macOS.
You will need to export some variables:
export CLIENT_ID=your_client_id_here
export CLIENT_SECRET=your_client_secret_here
export HOST=yourorg.jamfcloud.com
The script will run for 20 pages but you can control this by setting this:
export NUM_PAGES=20
To run, make sure you’re in the same folder as the script and do:
mv ./showHTTP500.txt ./showHTTP500.sh
chmod +x ./showHTTP500.sh
./showHTTP500.sh > ./email.txt
This will generate a text file that you can paste into an email to Jamf.
Attachments
Was this article helpful?
Glad to hear it! If you have anything you'd like to add, feel free to contact us.
Sorry to hear that. Please contact us if you'd like to provide more details.