There are three main steps to configuring the connection - you may need help from an IT admin to complete the first step.
- Create credentials in Azure (an ‘app’)
- Configure Business Central to accept a connection from 1Password SaaS Manager
- Connect SaaS Manager to Business Central
What data does SaaS Manager pull?
By default SaaS Manager will pull Purchase invoice data from Business Central. Line items that do not match the account codes specified will be discarded.
Alternatively, when you connect you may chose to take data from the General Ledger instead. This has the benefit that you can configure Security Filters in Business central. Security Filters don’t work with Purchase invoice data as Business Central’s API does not support filtering to Purchase invoice line items.
Create a new app in Azure
This also involves multiple steps:
- Register the basic app details
- Assign API permissions
- Create credentials
Register the app
Log in to Azure and find App registrations:
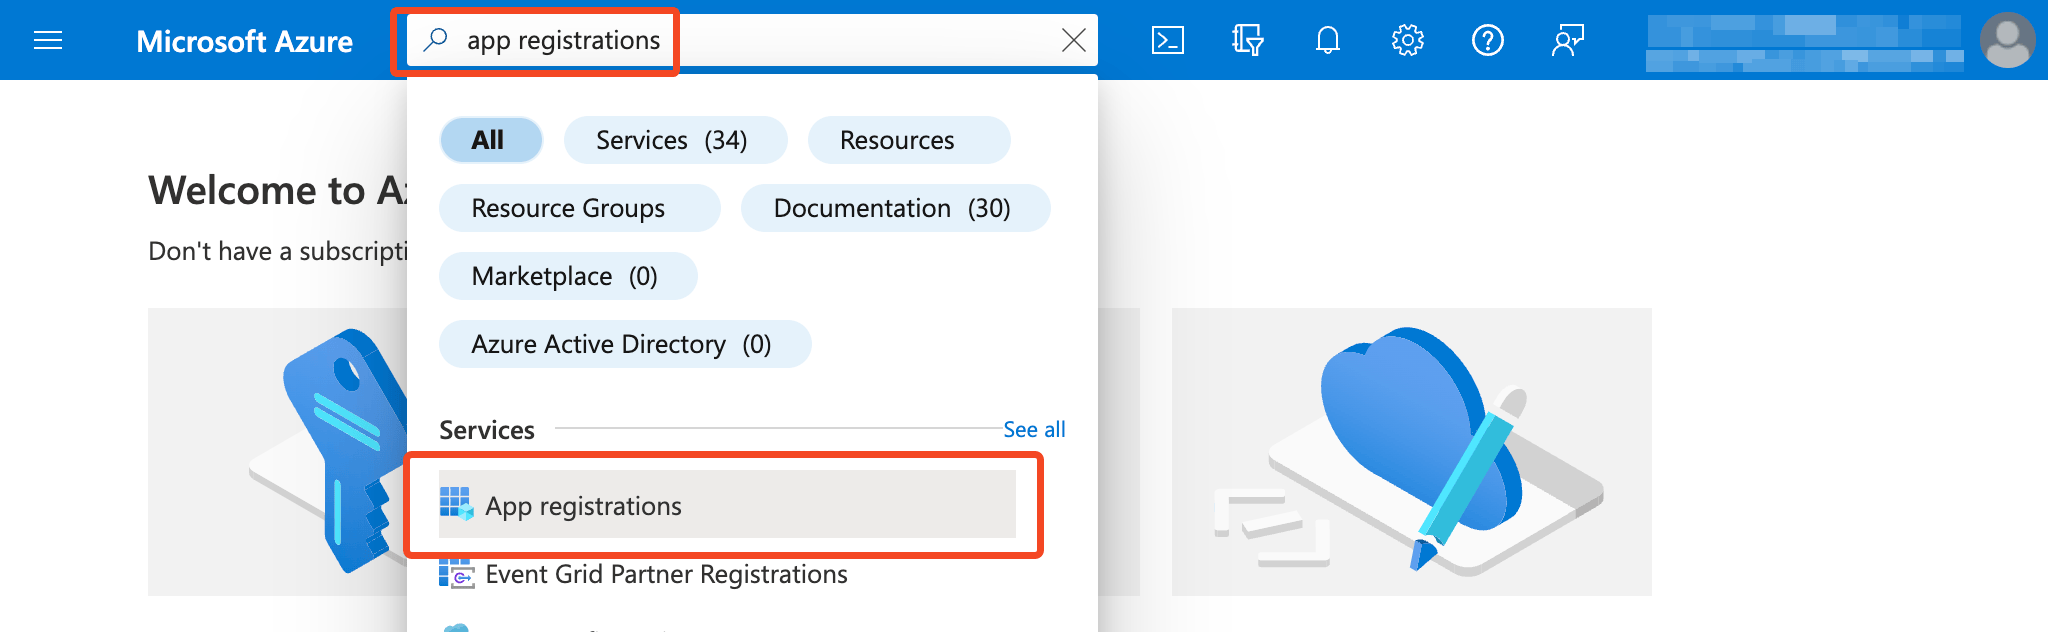
Click New registration.
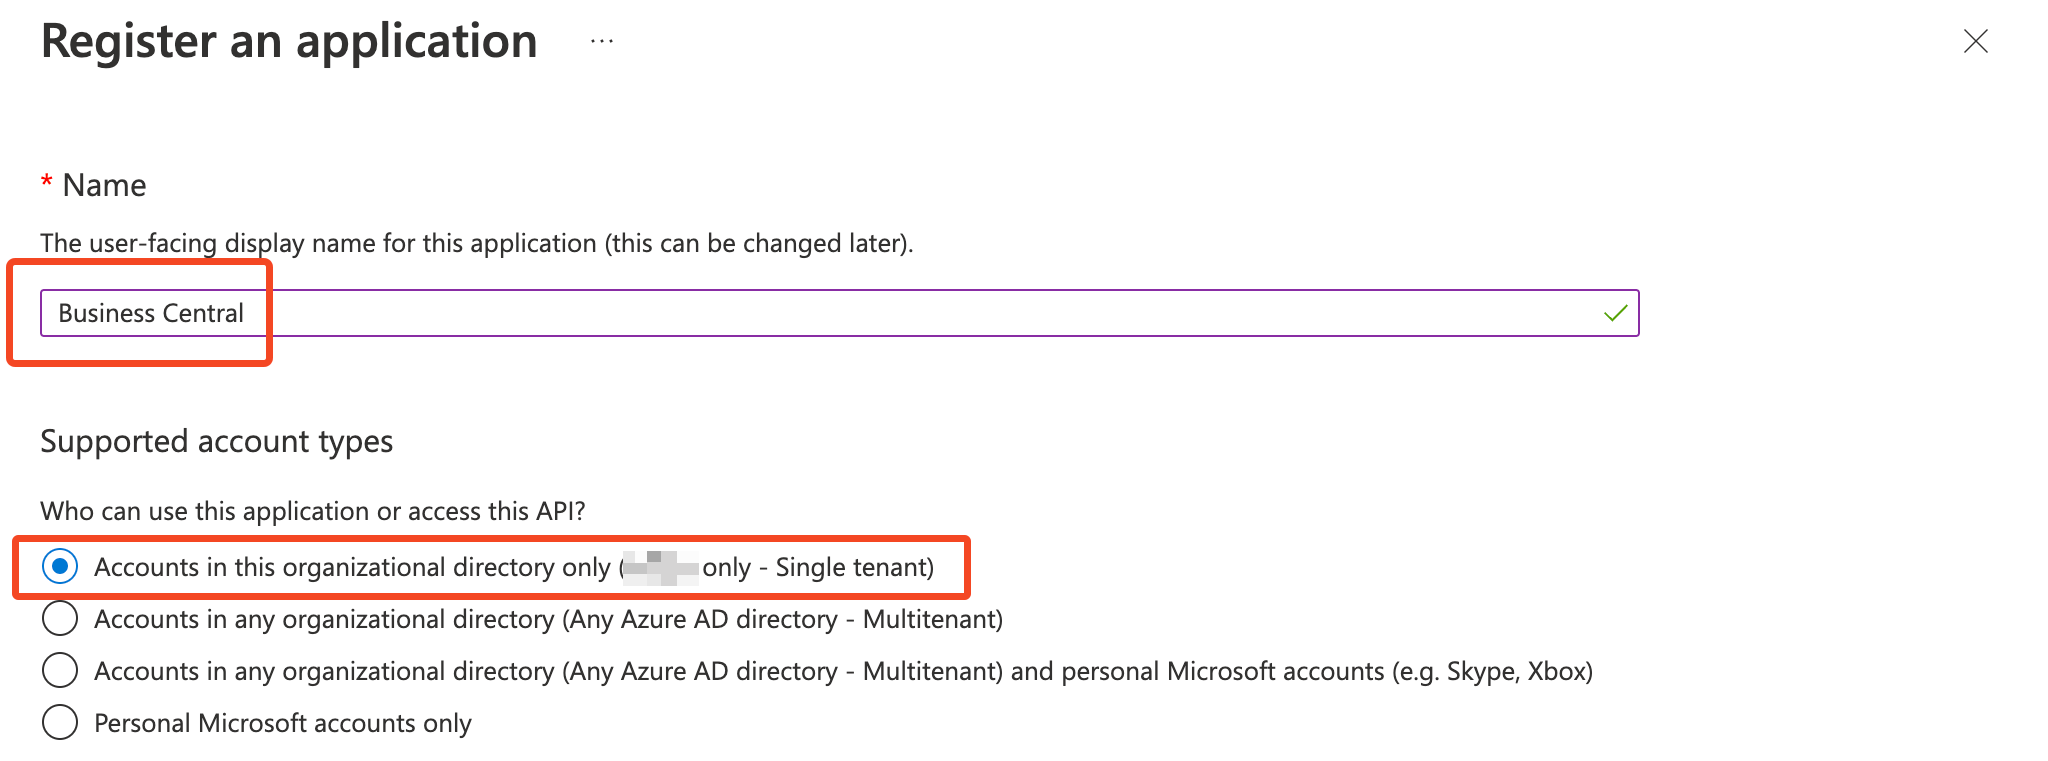
Enter a name (for example
Business Central).Choose Accounts in this organizational directory only (Single tenant).
Enter a Redirect URI:
Choose Web
Enter
https://businesscentral.dynamics.com/OAuthLanding.htm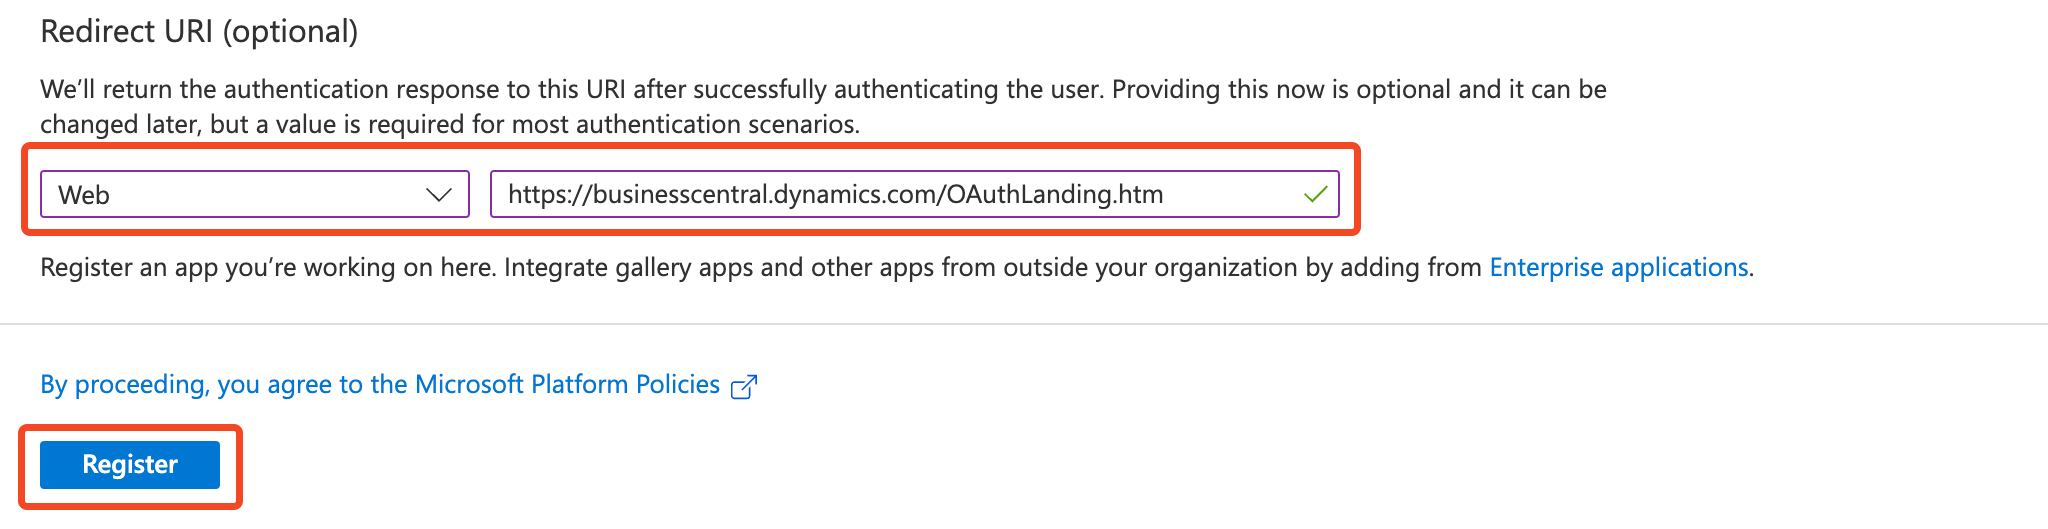
Click Register.
Configure API permissions
On the API permissions tab, click Add a permission
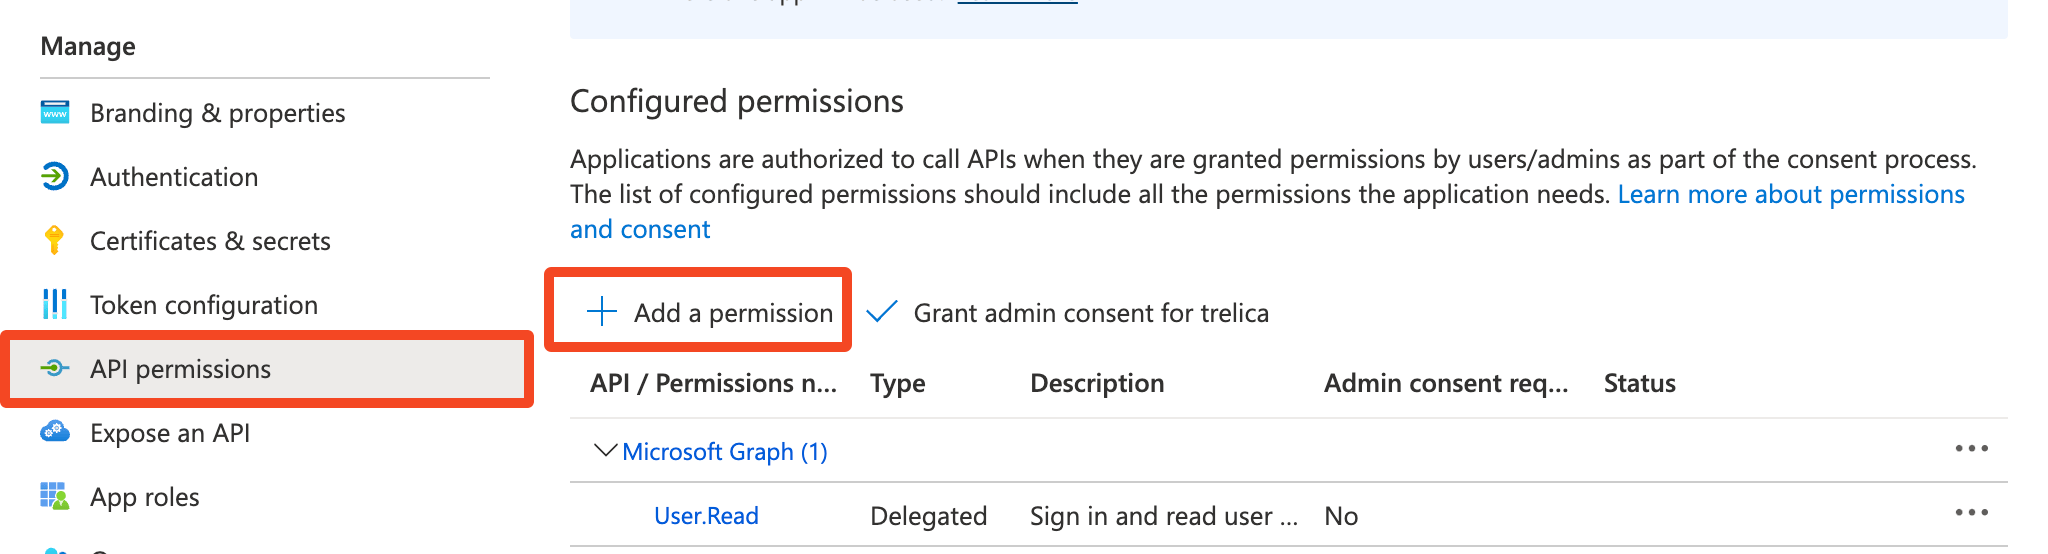
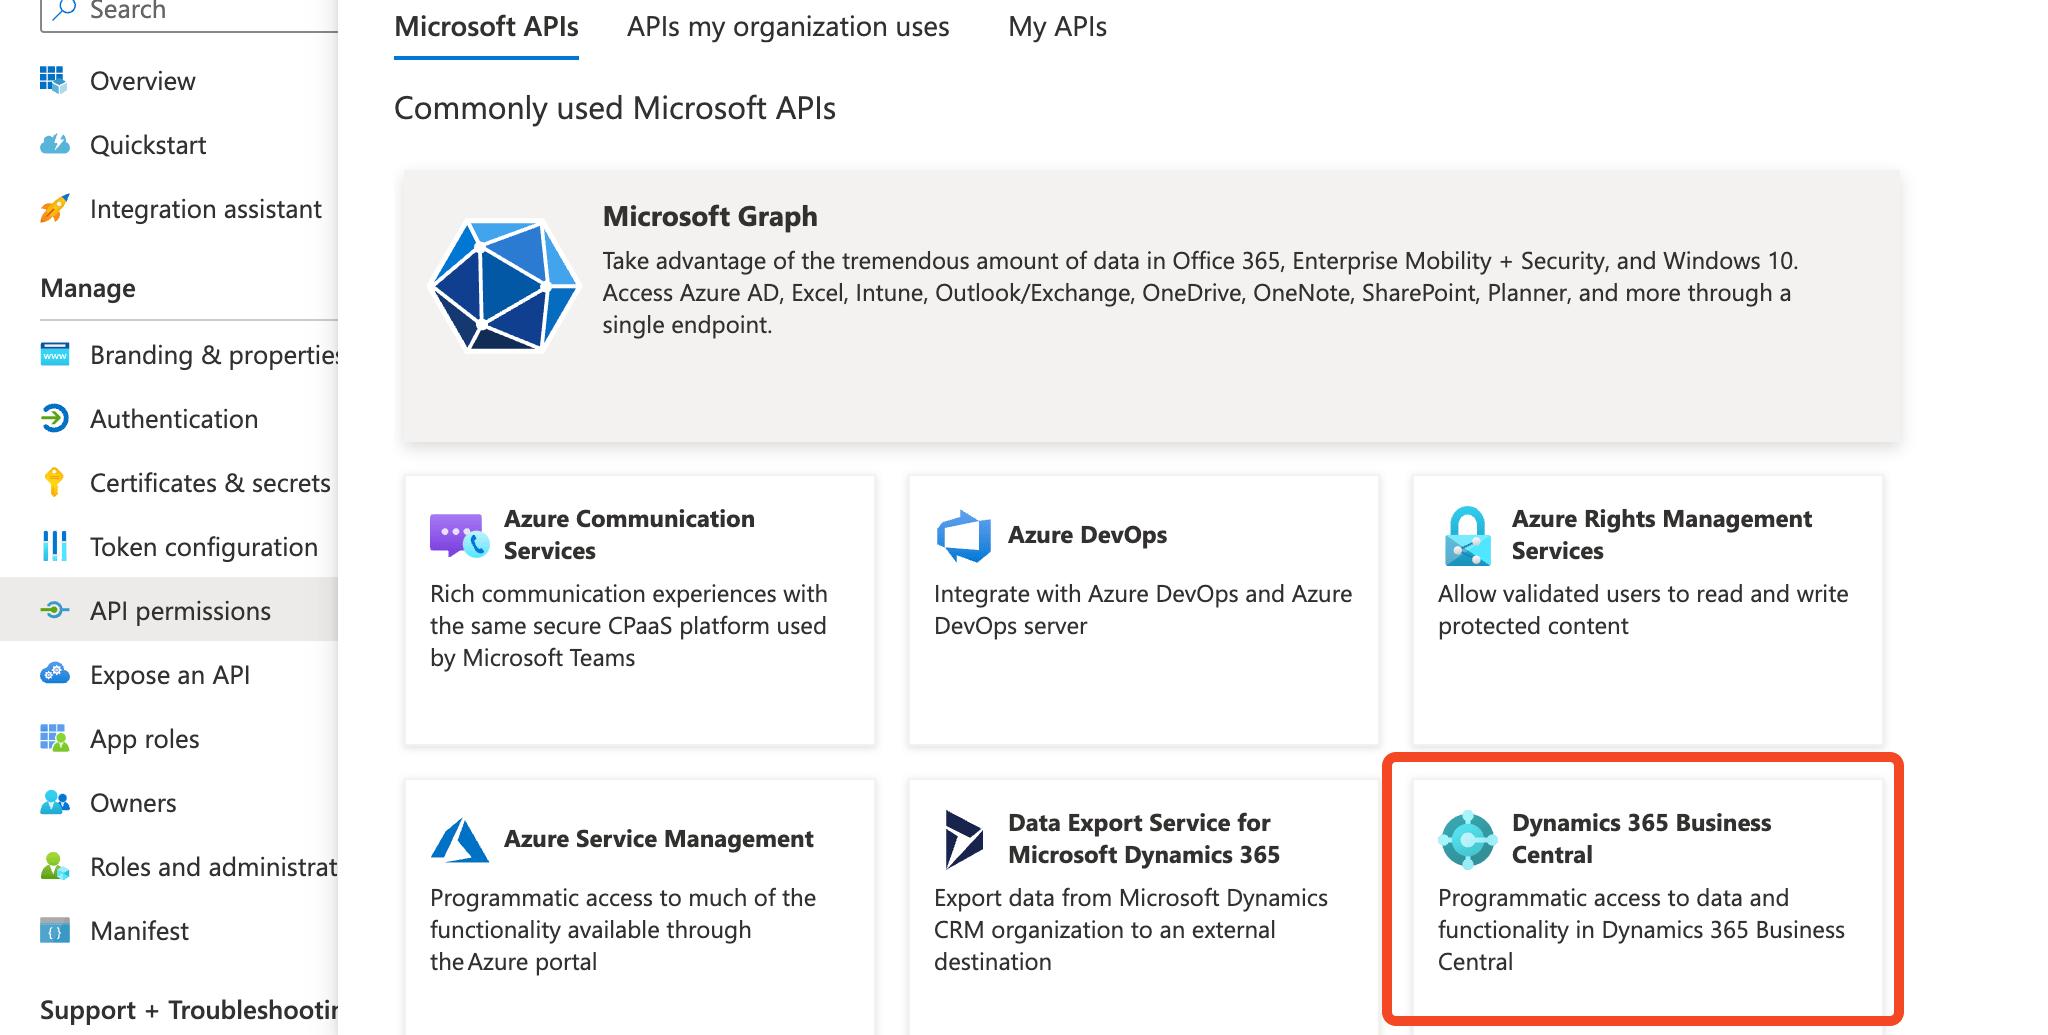
Under the Microsoft APIs tab choose Dynamics 365 Business Central
Choose Application permissions and then under API tick API.ReadWrite.All
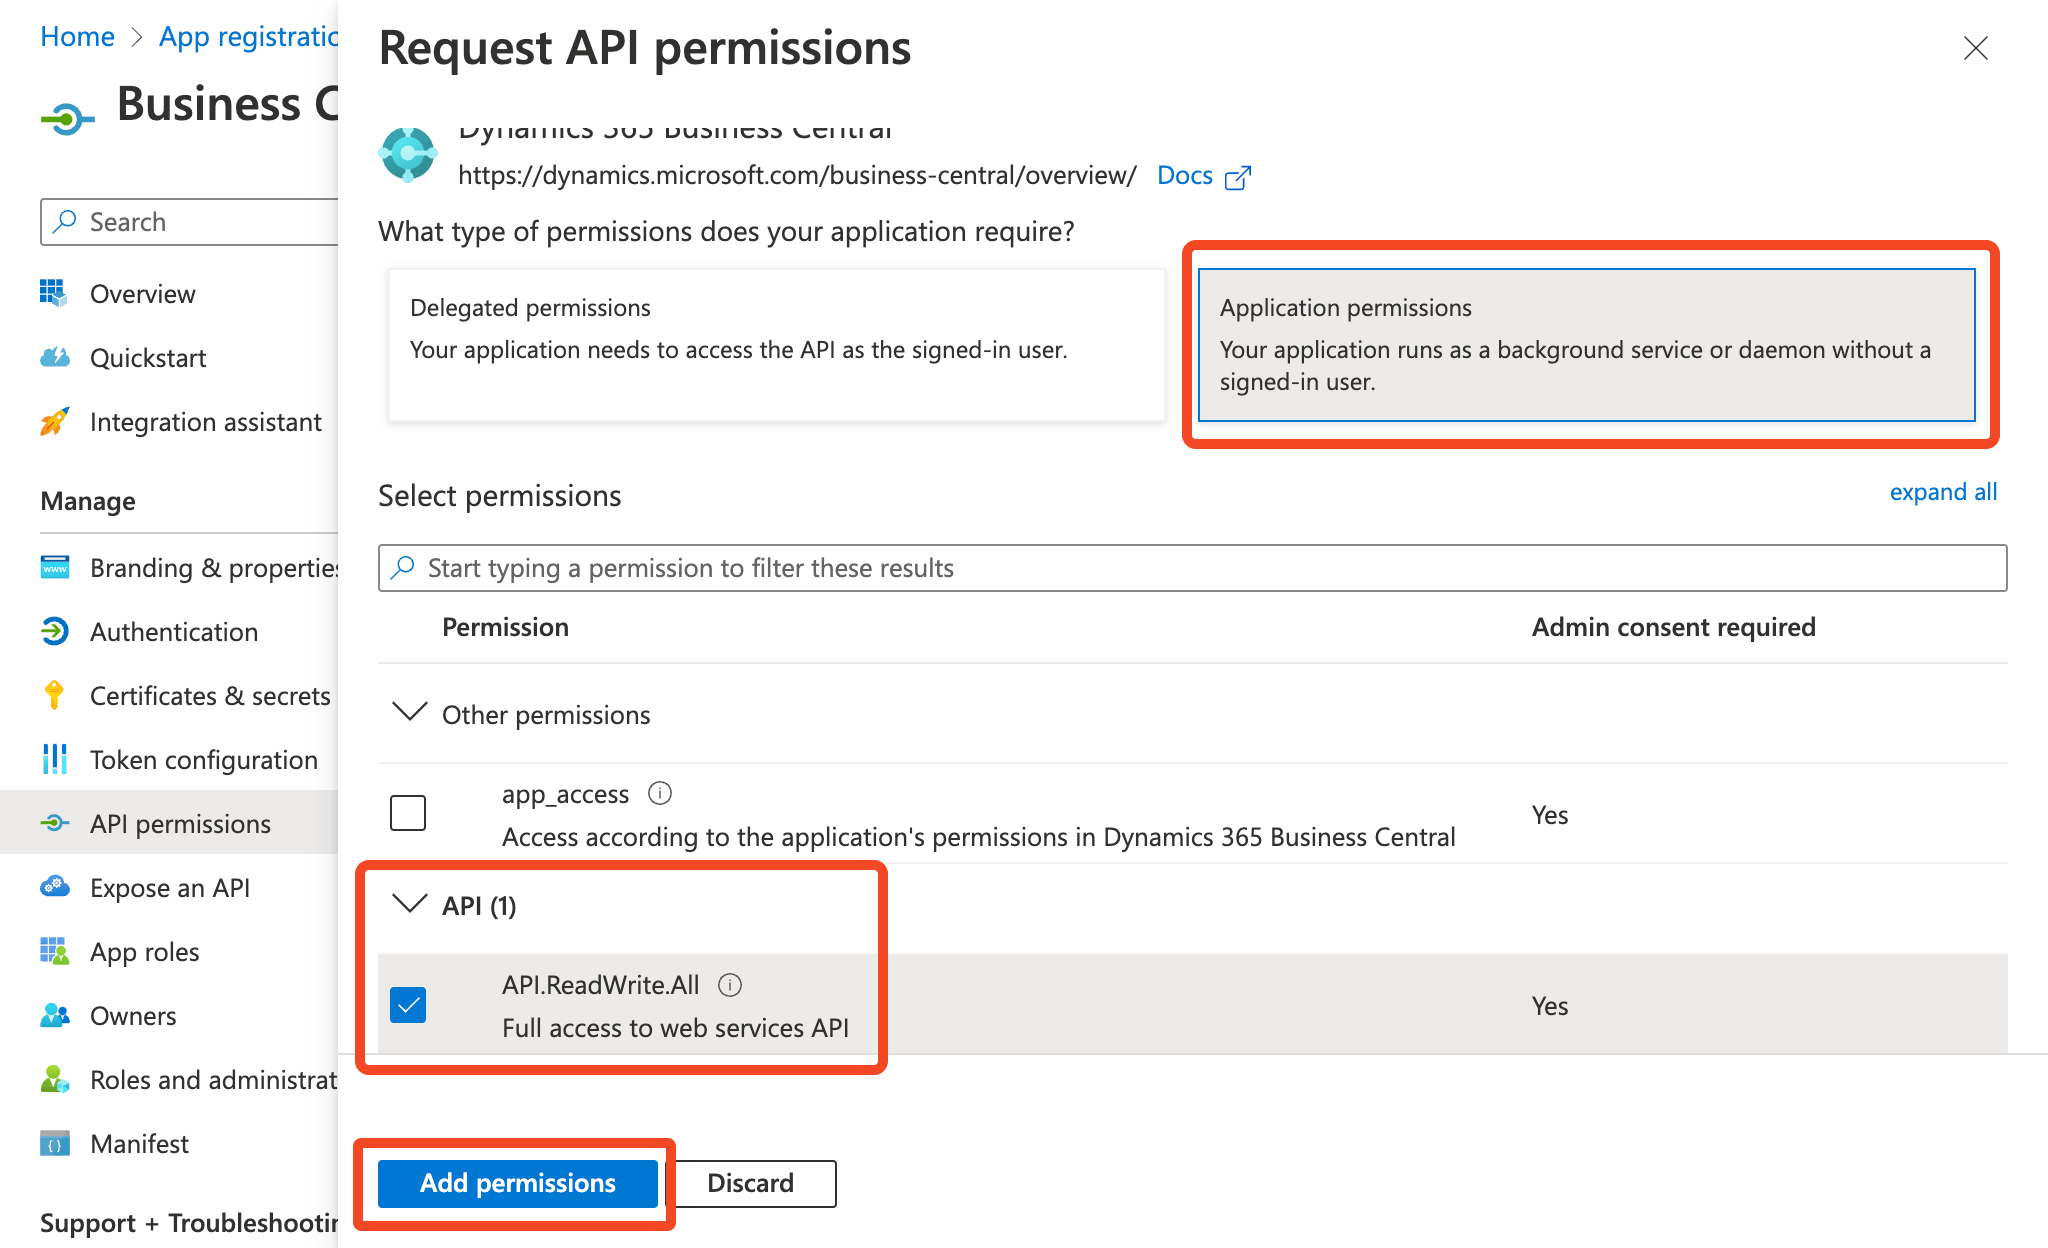
Click Add permissions.
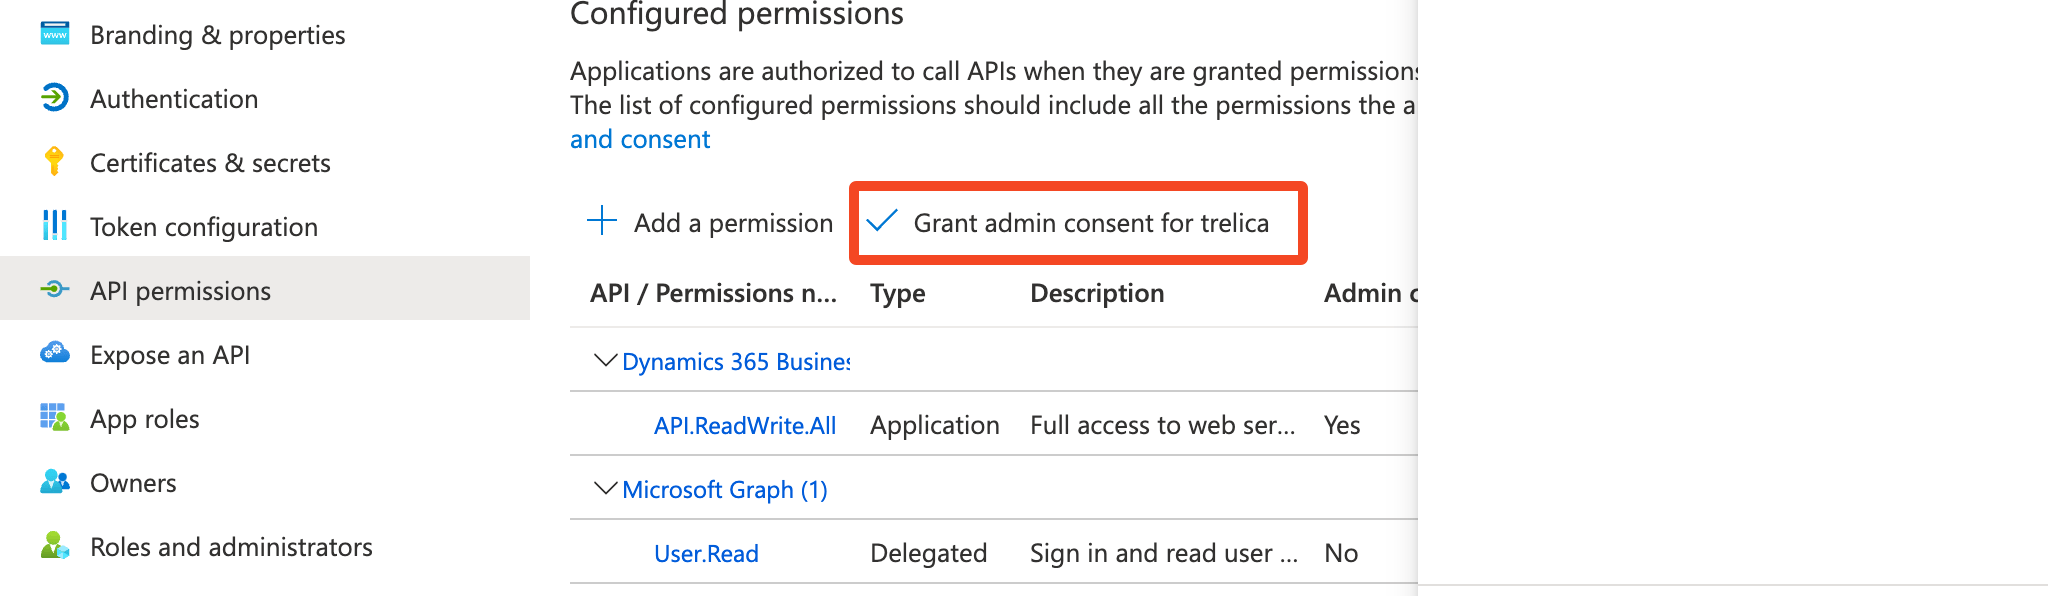
Finally, click Grant admin consent:<>
</>
Create a new secret
- Go to Certificates & secrets
- Click New client secret
- Give the secret a name (for example
SaaS Manager) and chose the Expiry duration that you are comfortable with (we recommend 12 or 24 months). - Click Add.
Collect the IDs from Azure
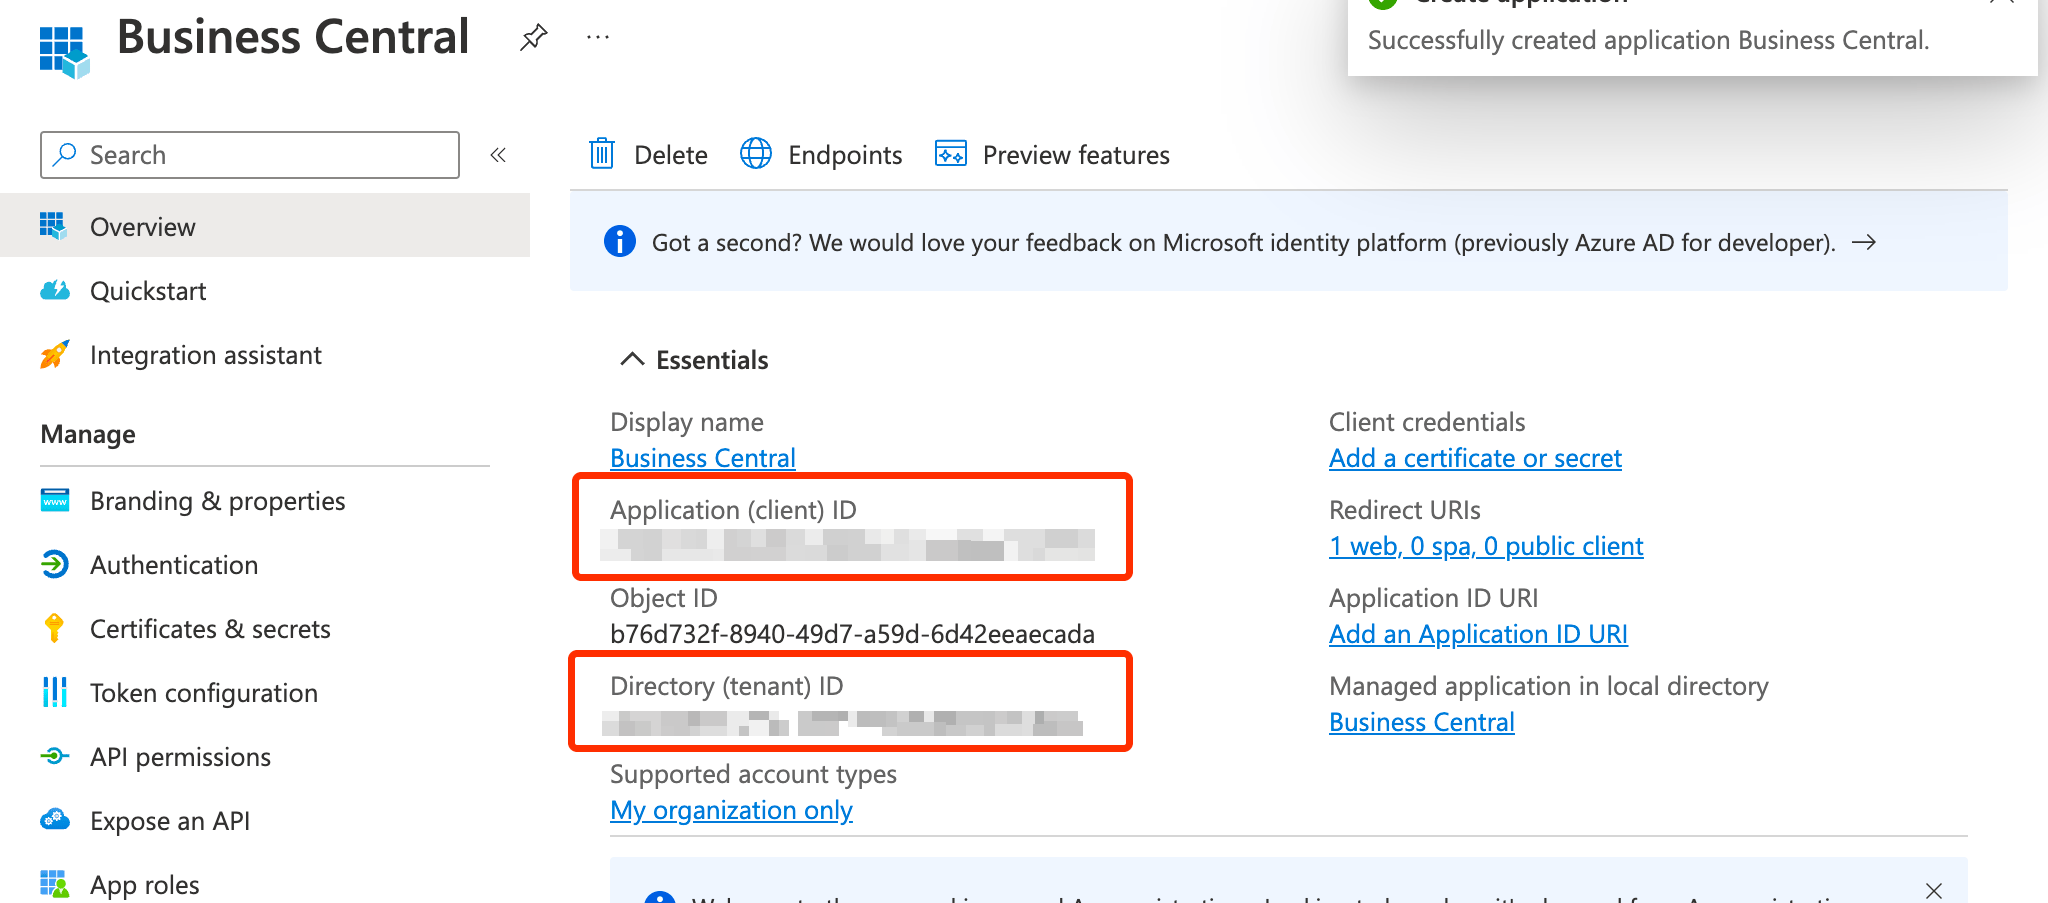
You need three IDs which you can copy from Azure:
From the Certificates & secrets tab copy the Client Secret Value (not the Secret ID).
The Client secret value will only be available for you to copy for a short period of time. If you are unable to view or copy it, then just create new one.
From the Overview tab copy the Application (client ID) and the **Directory (tenant) ID
**
Configure Business Central
Search for
Entraand click Microsoft Entra Applications: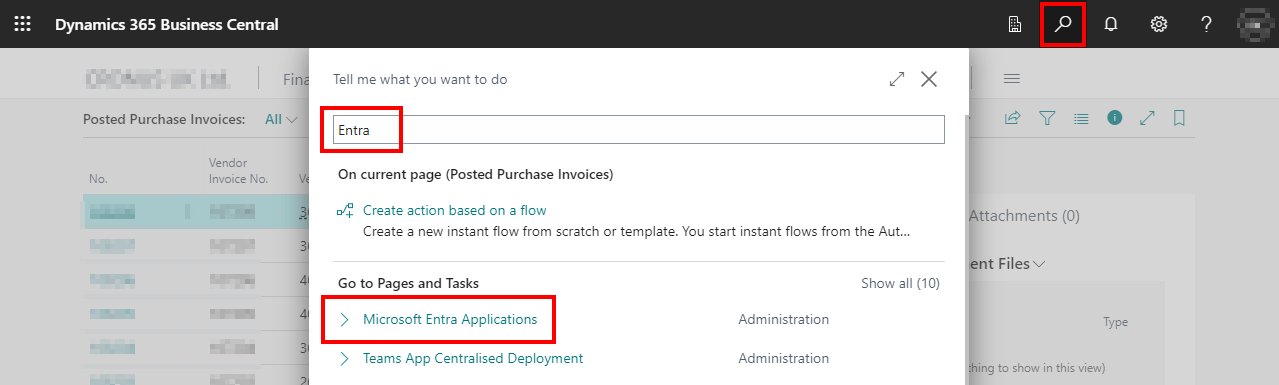
Click New:

Paste the Application (client ID) from Azure AD into the Client ID field:
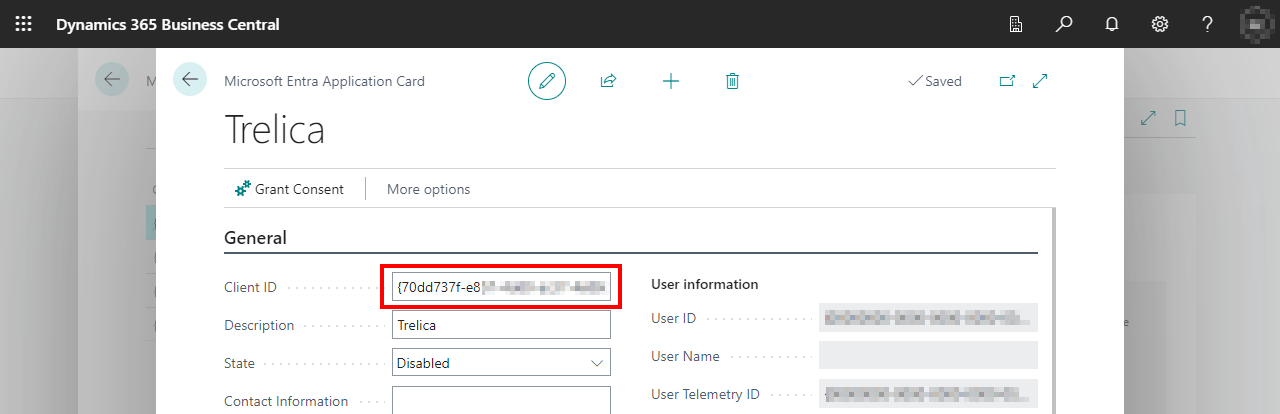
Enter SaaS Manager as the Description and then set the State to Enabled
Make sure that the D365 BASIC ISV user group is assigned:
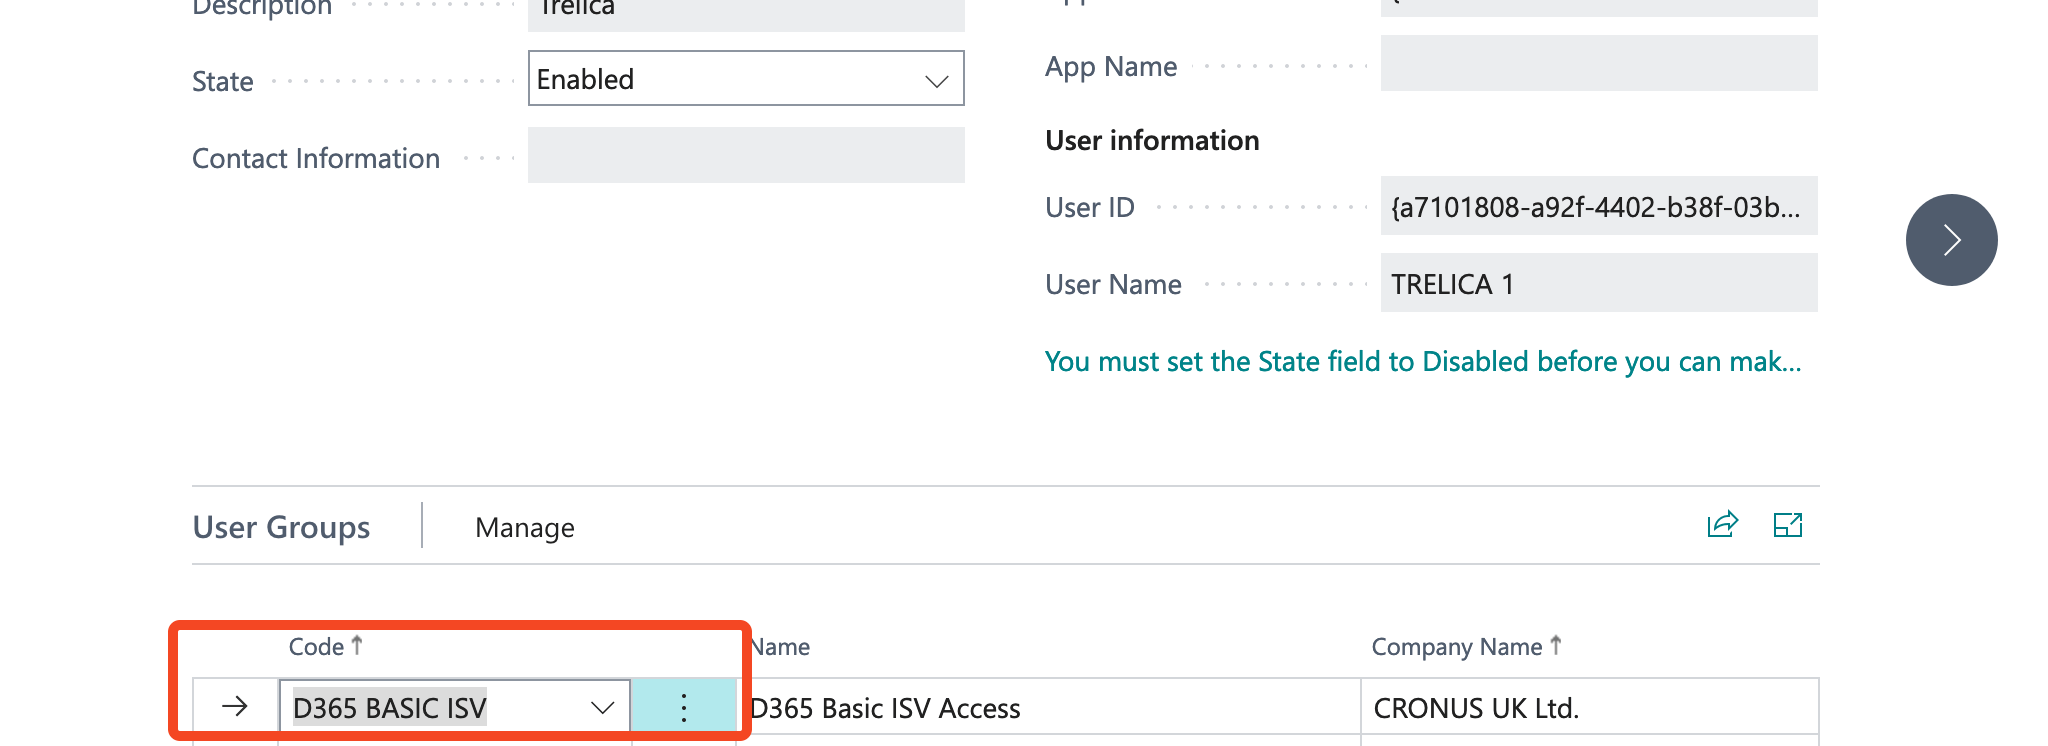
Click Grant Consent.
A confirmation popup will appear (you may need to allow popups in your browser). Click Accept.
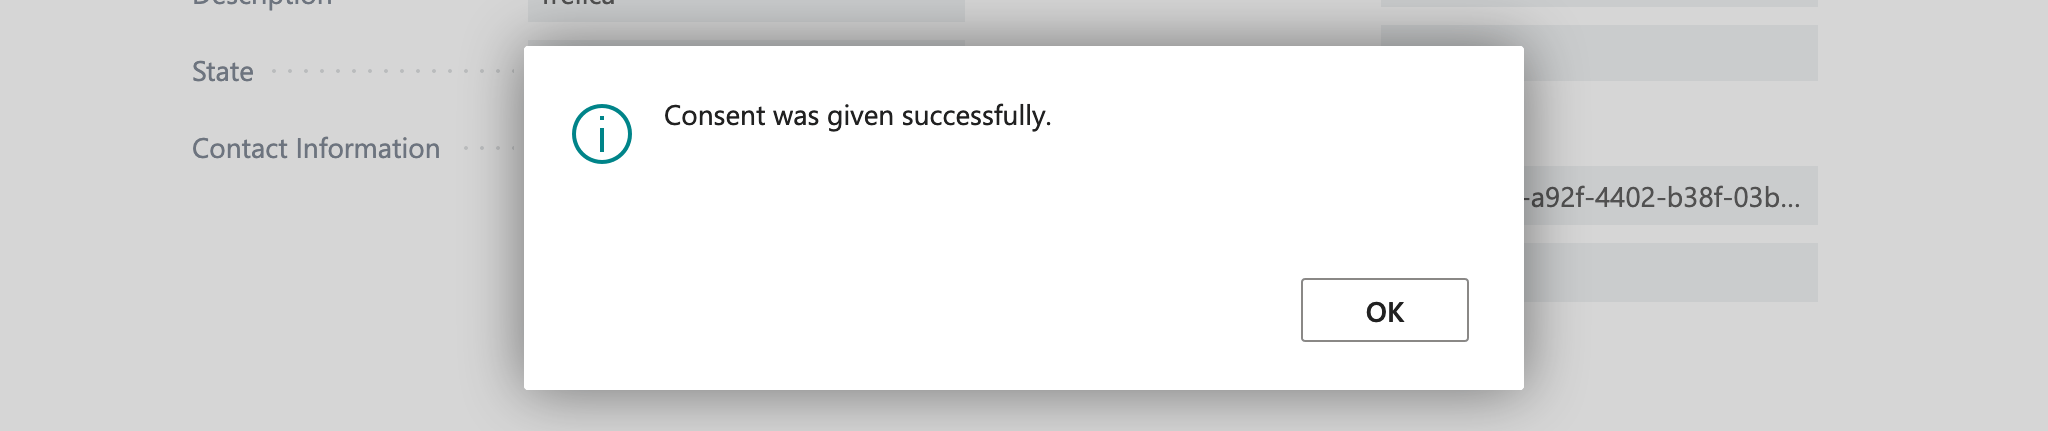
In the main Dynamics browser window, you will see a message confirming that consent was given:
Connect SaaS Manager to Business Central
Identify the name of your Business Central environment. Login to Business Central and go to Admin Center under the Settings cog.
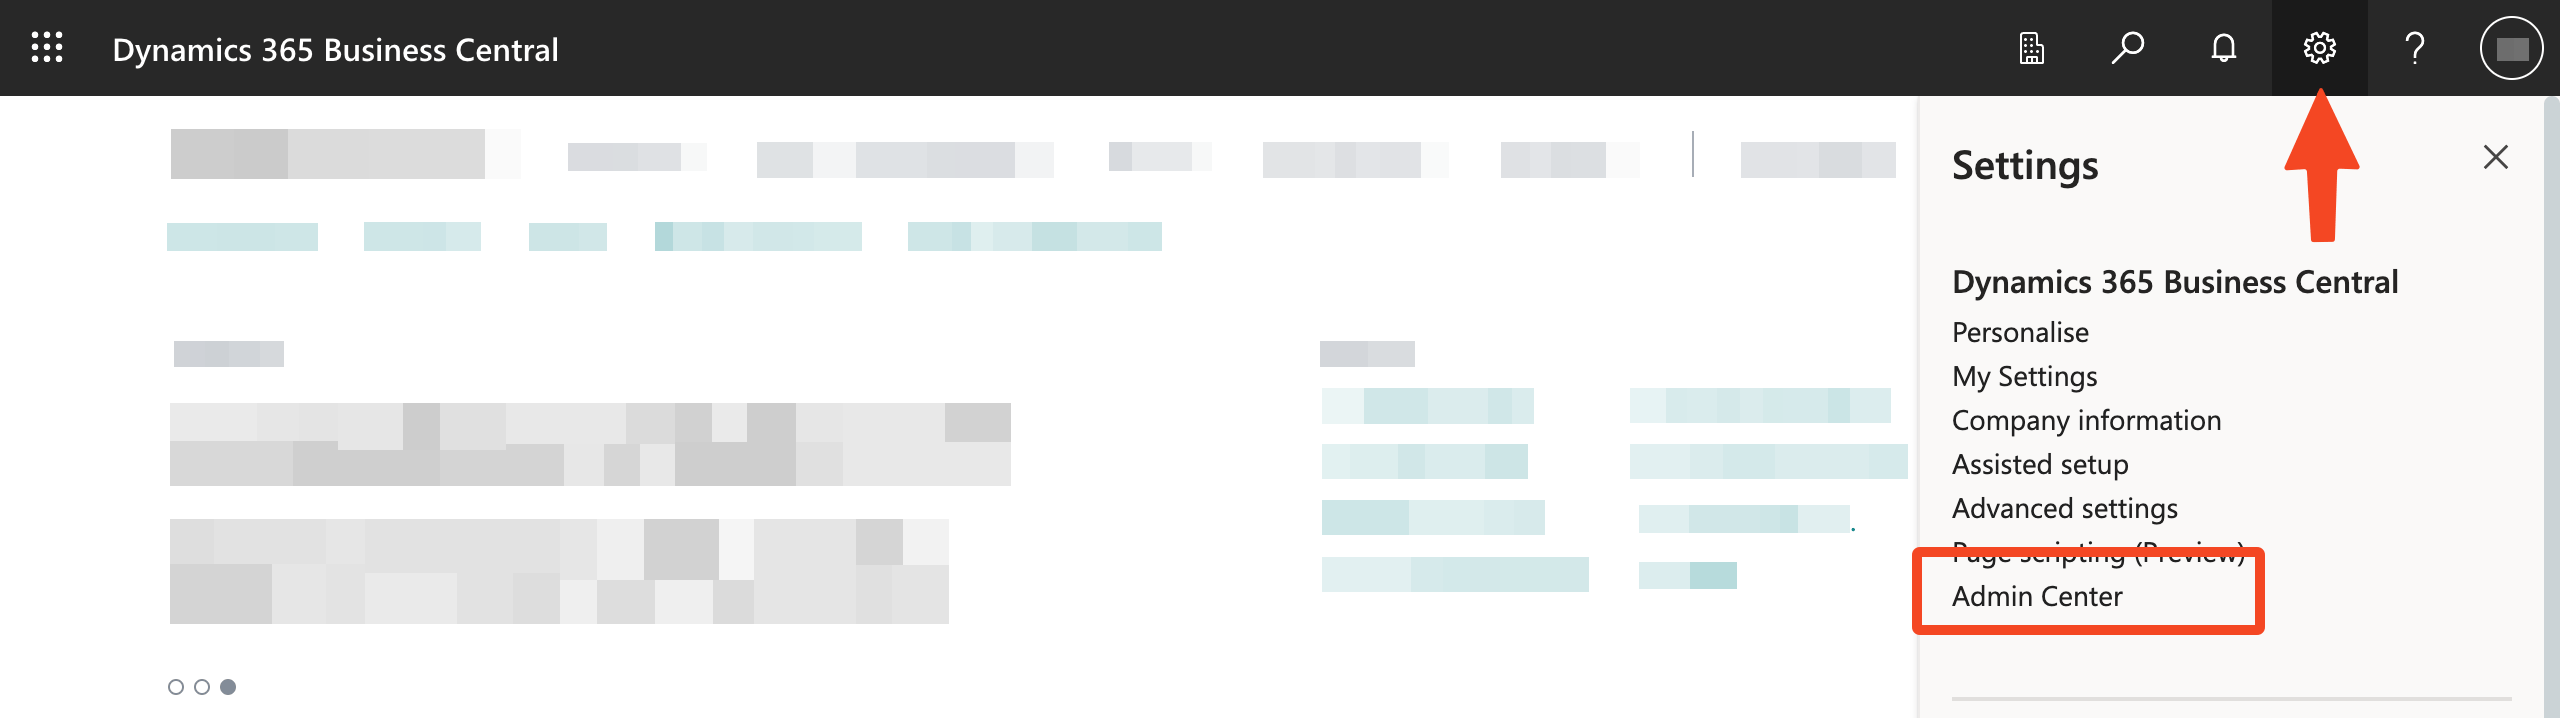
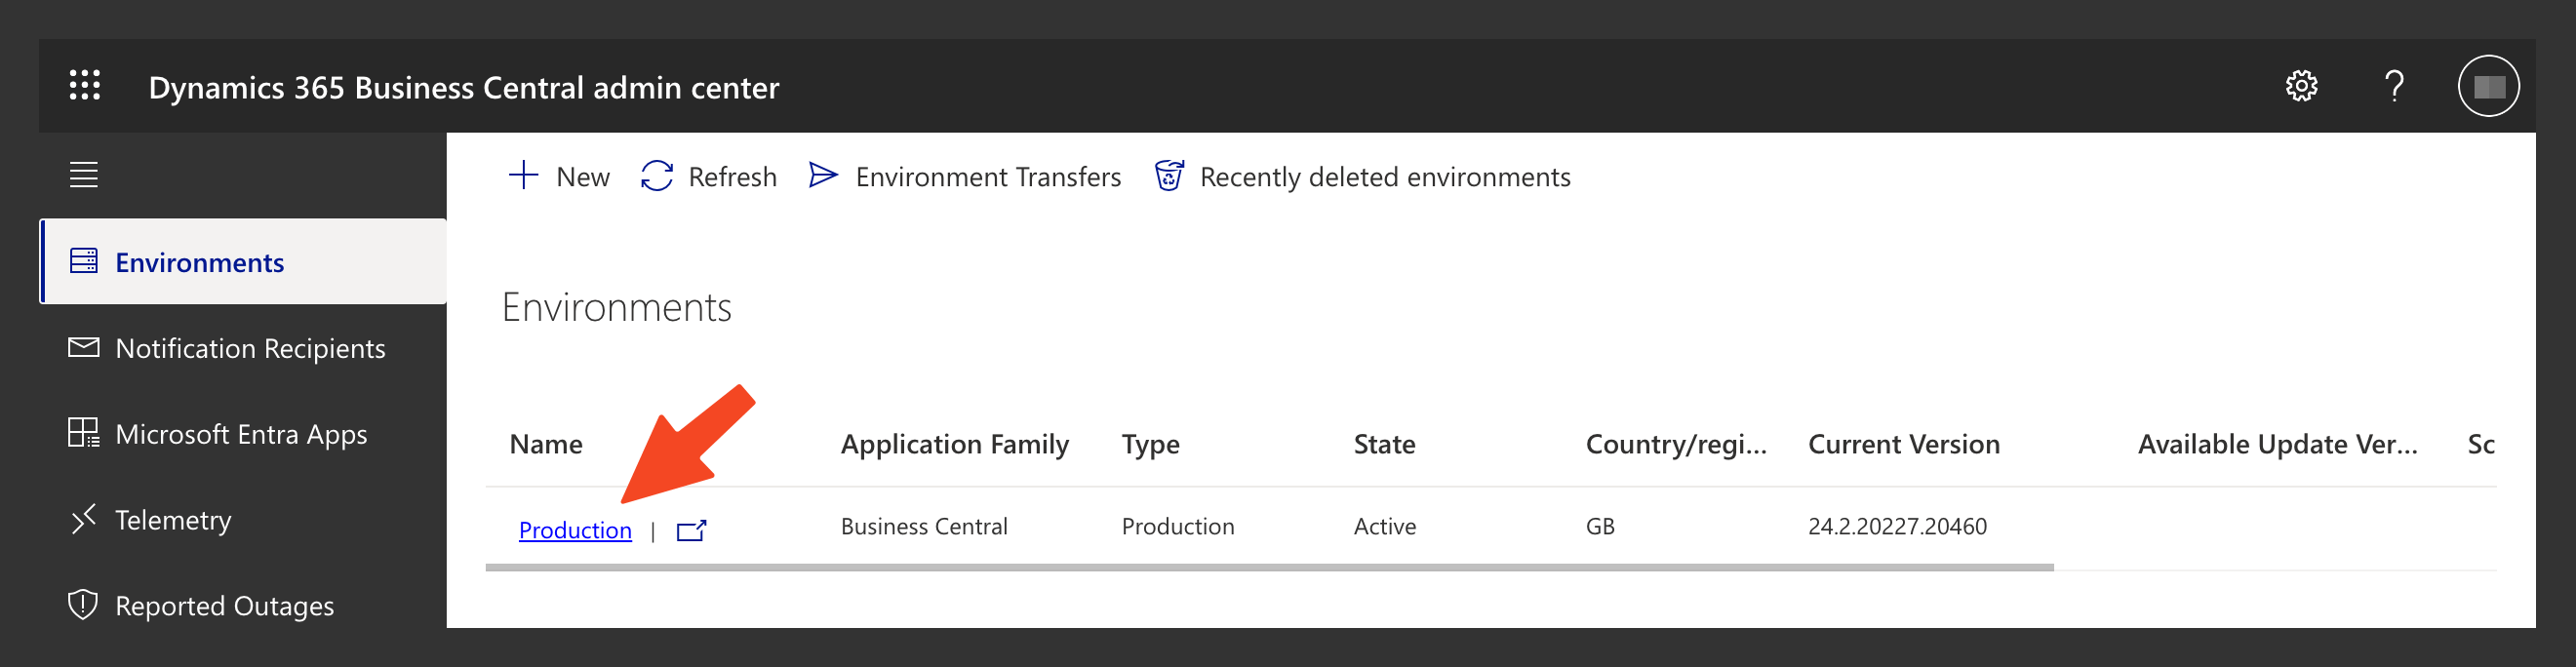
In the Admin Center you will see a list of environments. You will need to copy the name of the environment that you want to connect to SaaS Manager.
The underlining on the links makes underscore (_) characters look like spaces. Click through on the link to see the name without any links to be sure you are entering the right name.
In SaaS Manager, go to Integrations > Business Central
Click Connect and enter the Environment name and the IDs that you collected earlier.
Click Connect again.
Select the expense categories you want to import from, and click Import.
FAQ
I get the error “Sorry, the current permissions prevented the action. (TableData 1366 Field Monitoring Setup IndirectRead: Base Application)”
The API action in Business Central to read invoices is internally querying the Field Monitoring Setup table (id 1366) but does not have sufficient permissions. IndirectRead is a Business Central permission type which means that a request can indirectly (but not directly) read from the table.
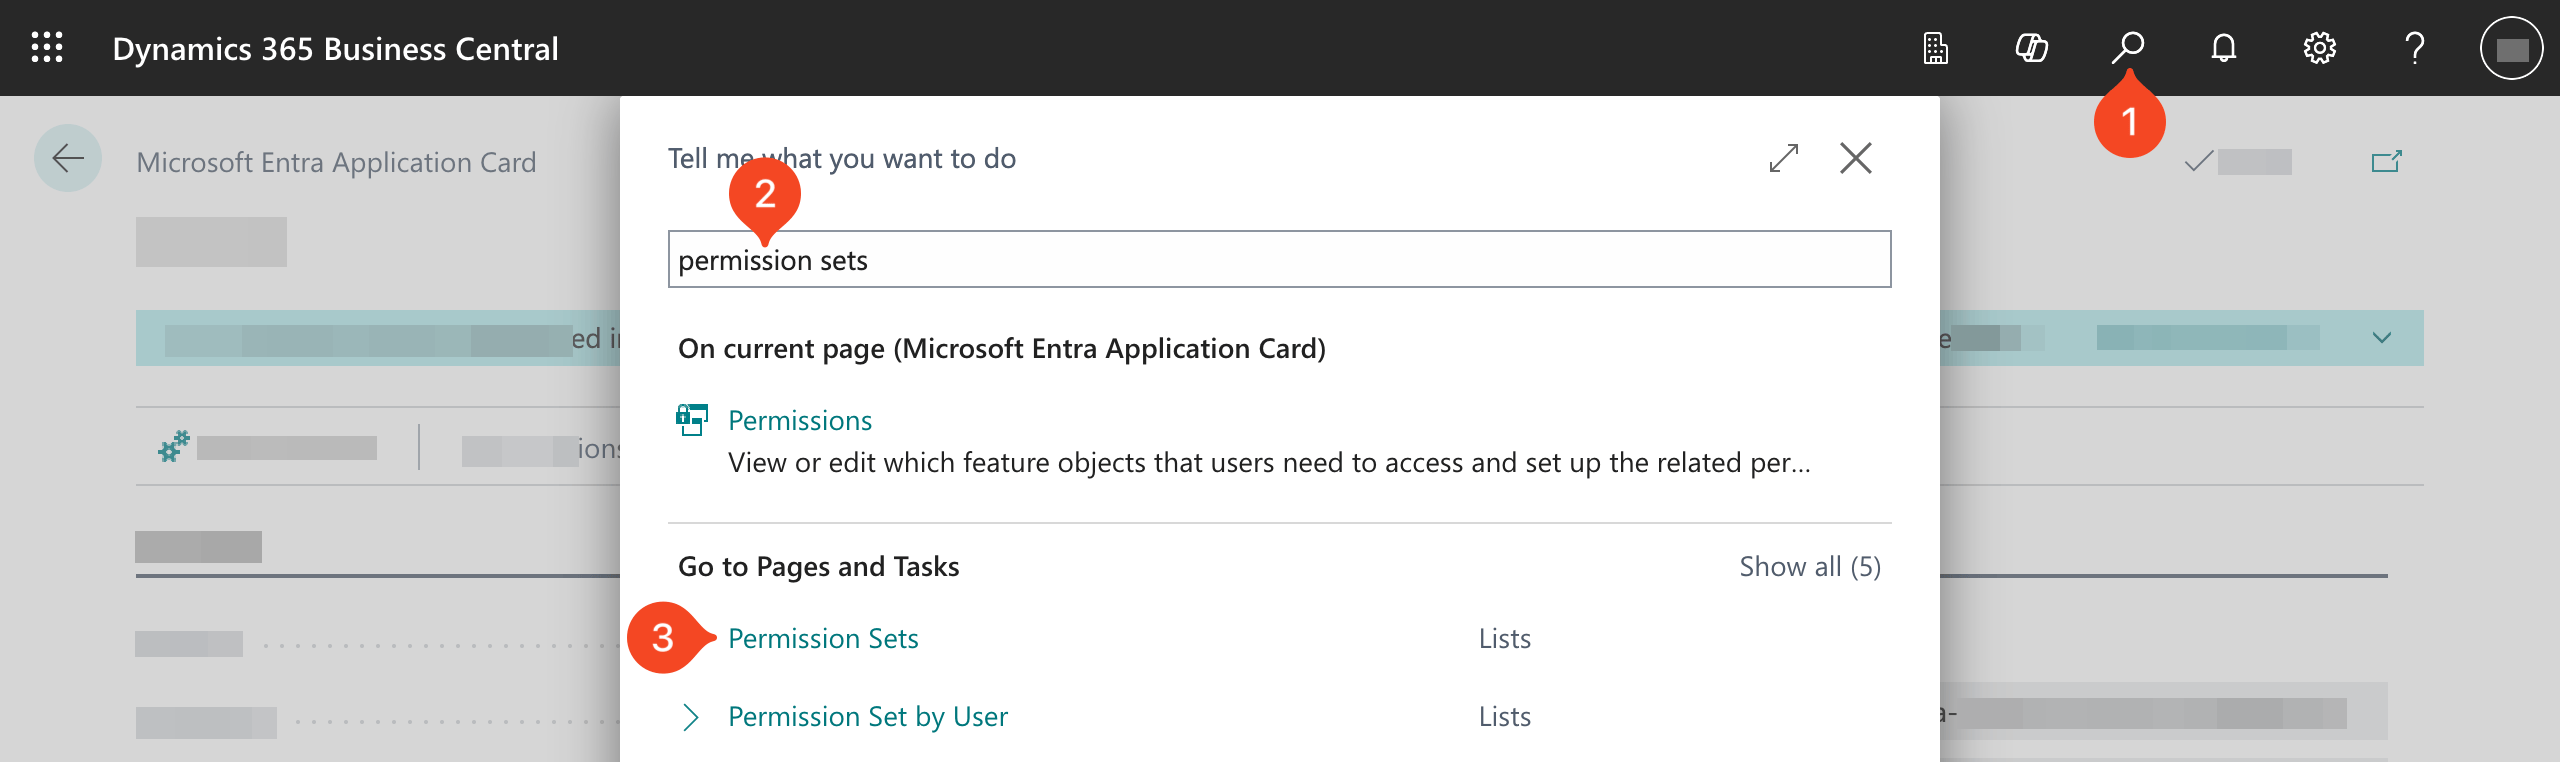
First, create a new permission set with additional permissions. Find the permission sets page:
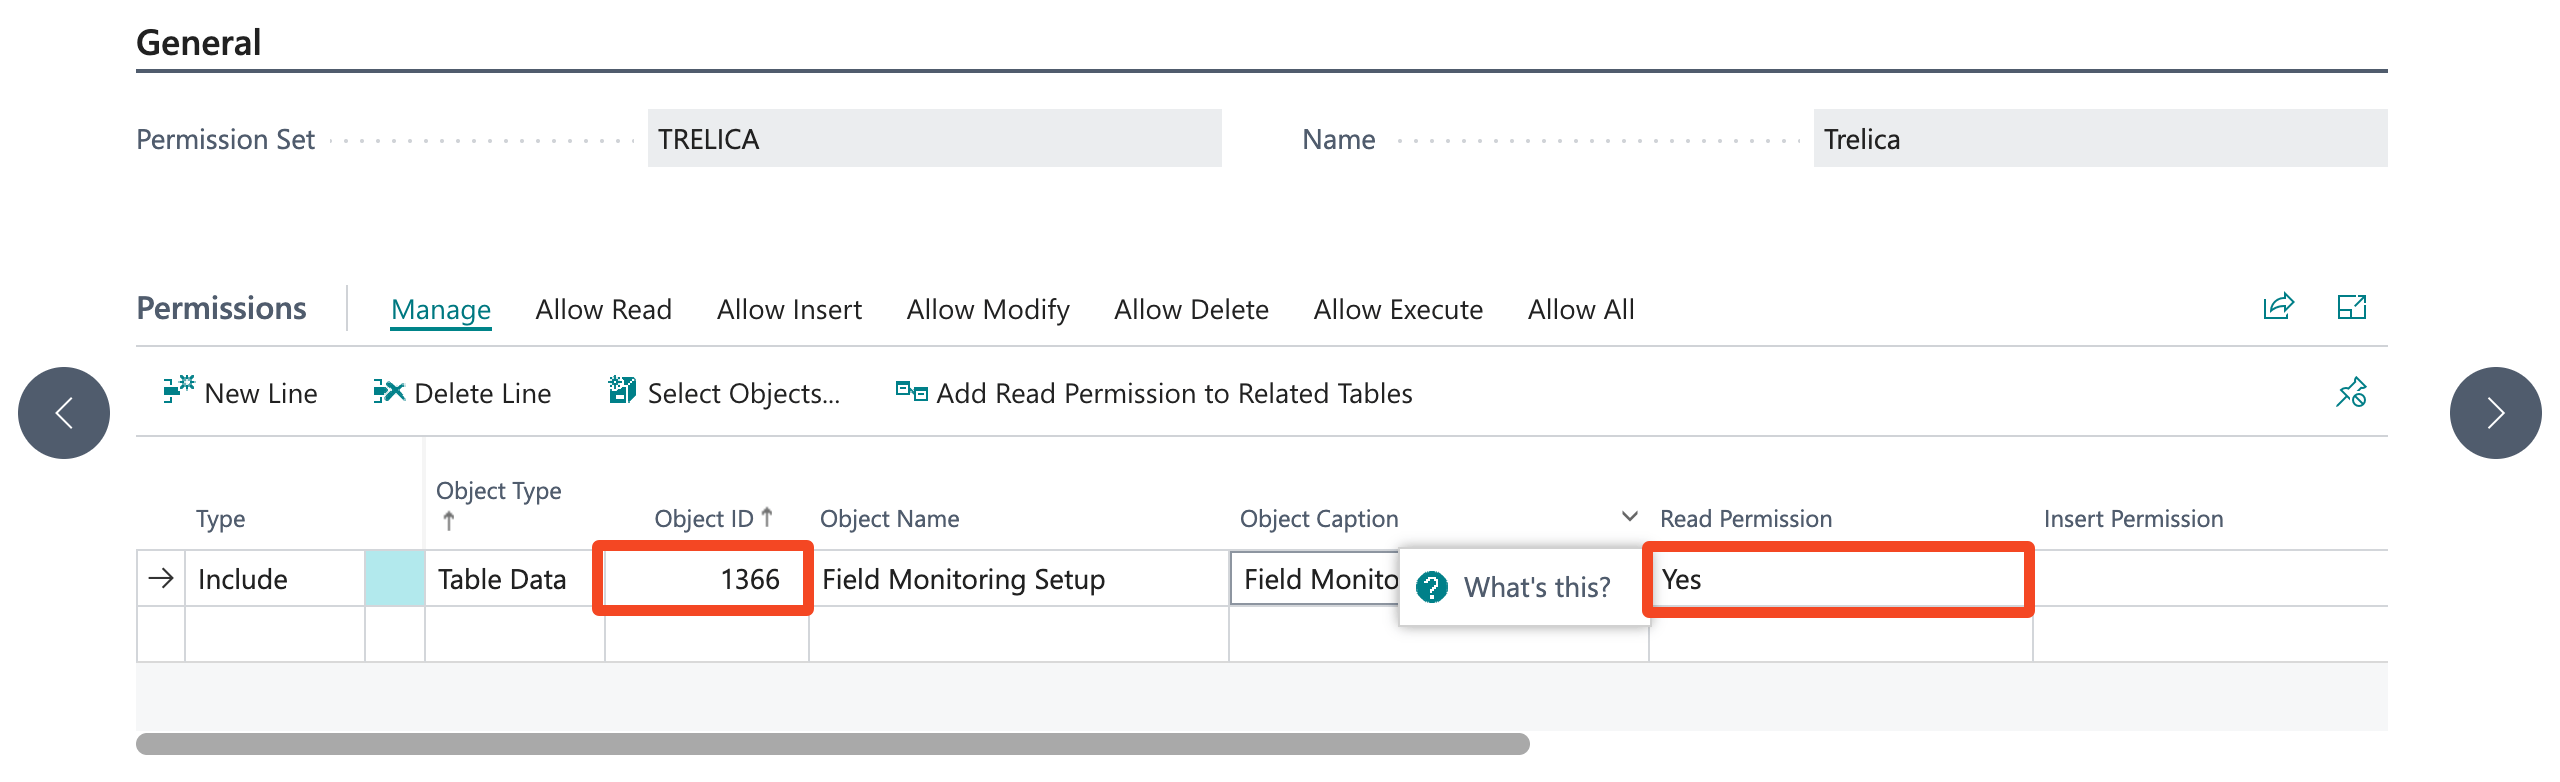
Click New and enter a name (for example SAASMANAGER), and then click to edit the Permissions.
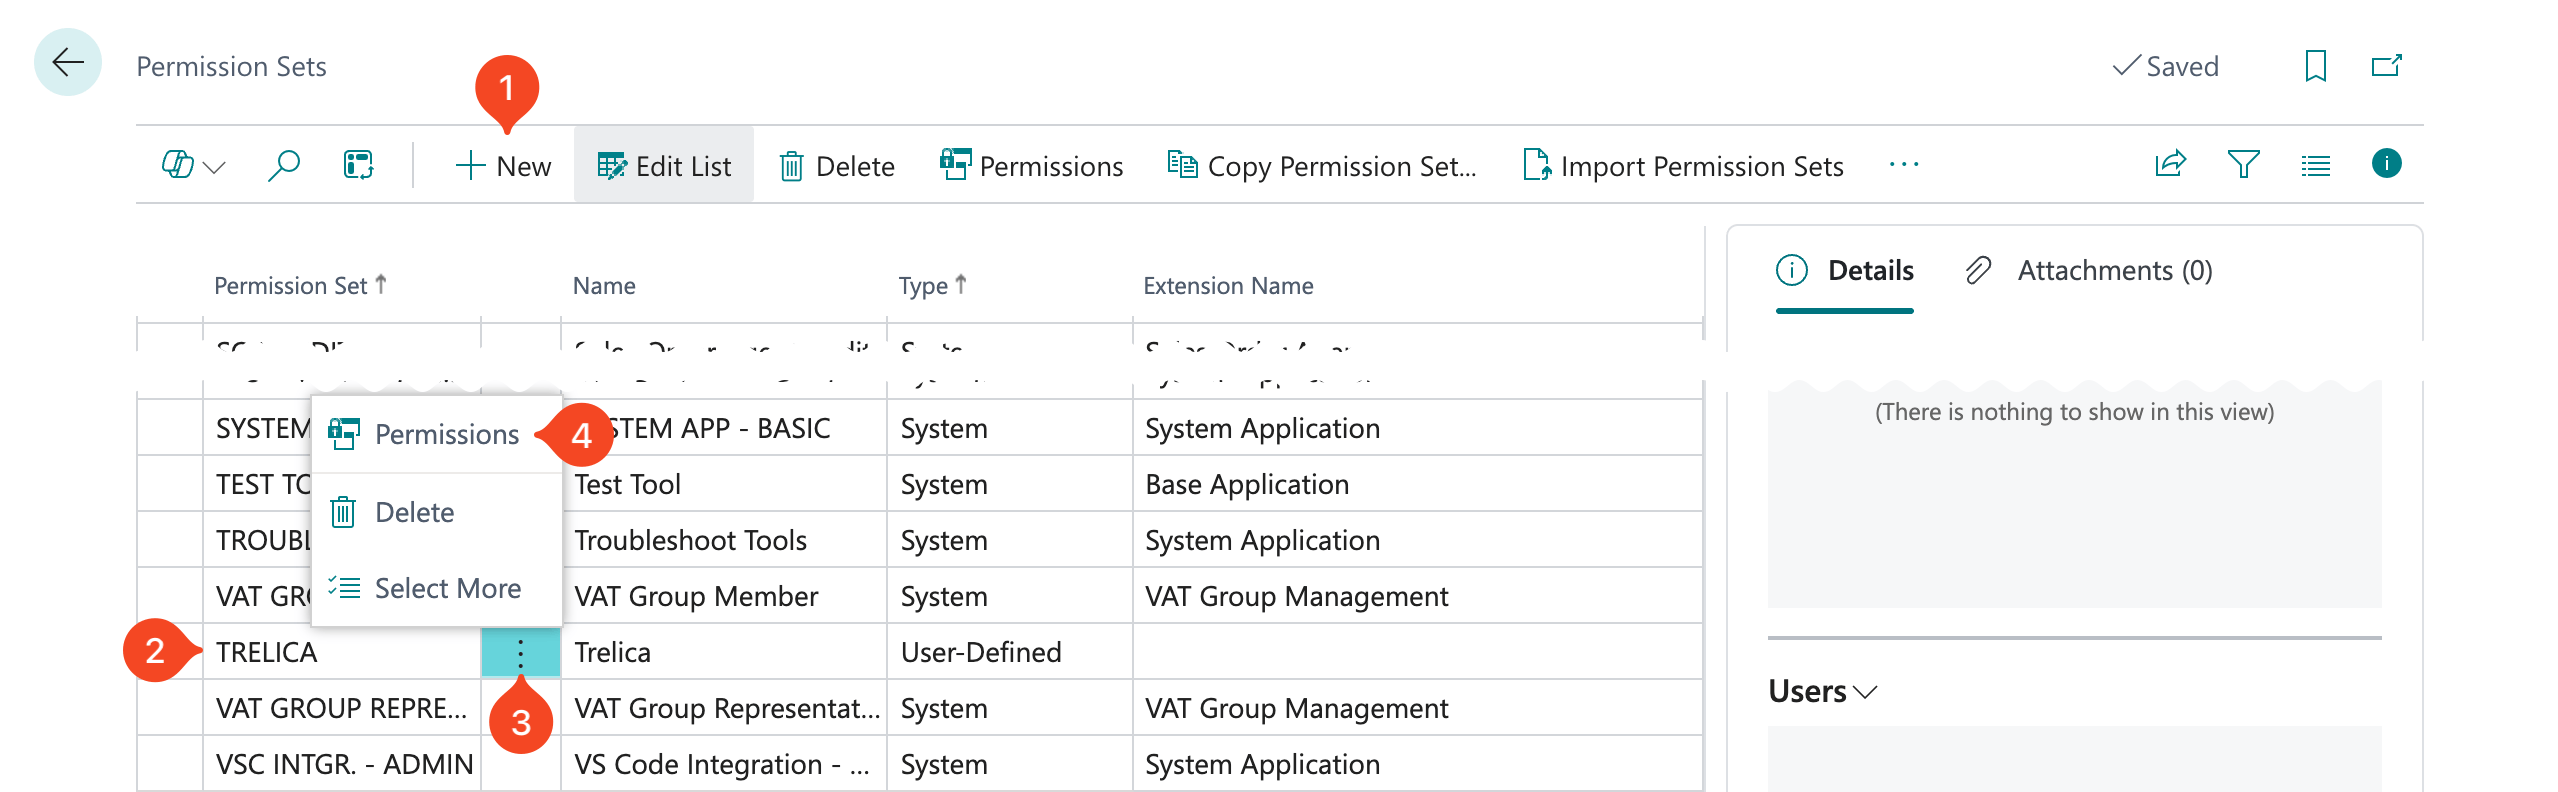
Enter the Object ID (1366) and tab out of the field - “Field Monitoring Setup” will be selected. Go ahead and grant Read permission.
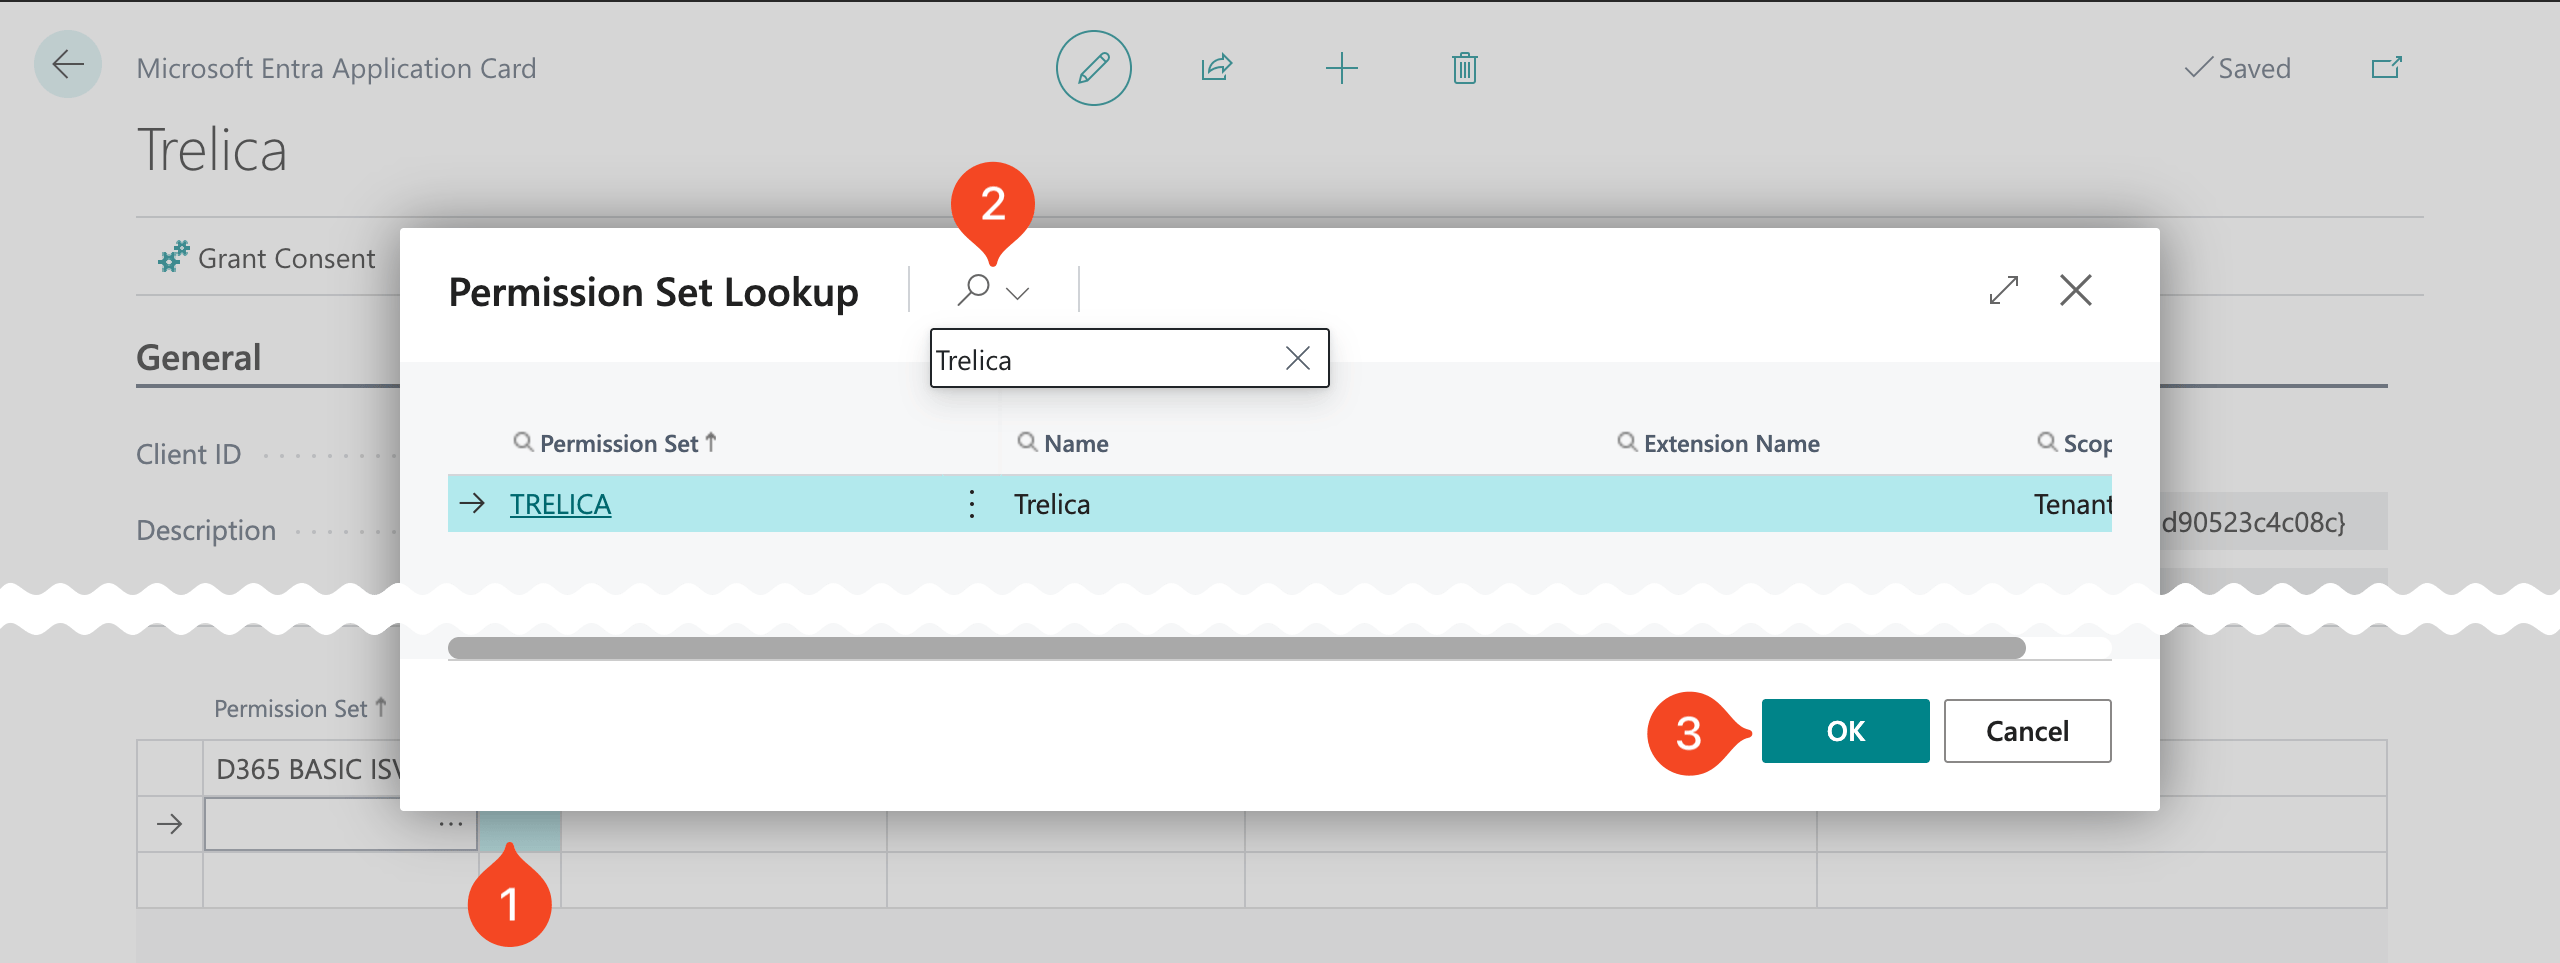
Now locate your Entra application and click to add a new permission set:
Was this article helpful?
Glad to hear it! If you have anything you'd like to add, feel free to contact us.
Sorry to hear that. Please contact us if you'd like to provide more details.